
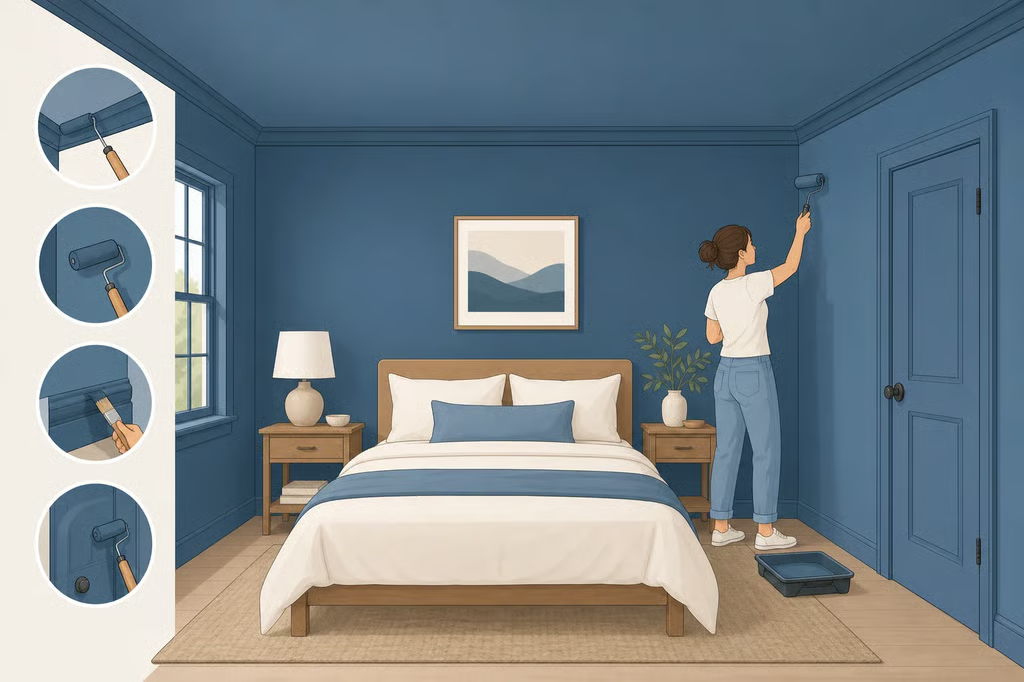
- How to Color Drench a Bedroom and Pick a Focal Feature
- How to color drench a bedroom without making it feel flat
- Gather materials and check the room first
- Test the color and estimate the paint
- Prepare every surface before painting
- Paint walls, ceiling, trim, and baseboards in order
- Choose one focal feature that fits the room
- Finish the project in the right order
How to Color Drench a Bedroom and Pick a Focal Feature
Learning how to color drench a bedroom starts with one clear decision: do you want every major surface to disappear into one enveloping shade, or do you want a layered palette with the strongest color reserved for one feature? True color drenching means painting the walls, ceiling, trim, doors, and baseboards in one color rather than leaving the trim white. The result can feel dramatic and cohesive, but only if the surfaces are prepared properly and the finish is planned before the first can is opened.
Color drenching has become the dominant painting trend of 2026, with Pinterest searches for the term up 340% year over year, according to PaintLikePro. Before committing to a color drenched bedroom, check the room’s light, your lease or HOA rules, the condition of the walls, and how much painting you can realistically complete before the room needs to be used again.
How to color drench a bedroom without making it feel flat
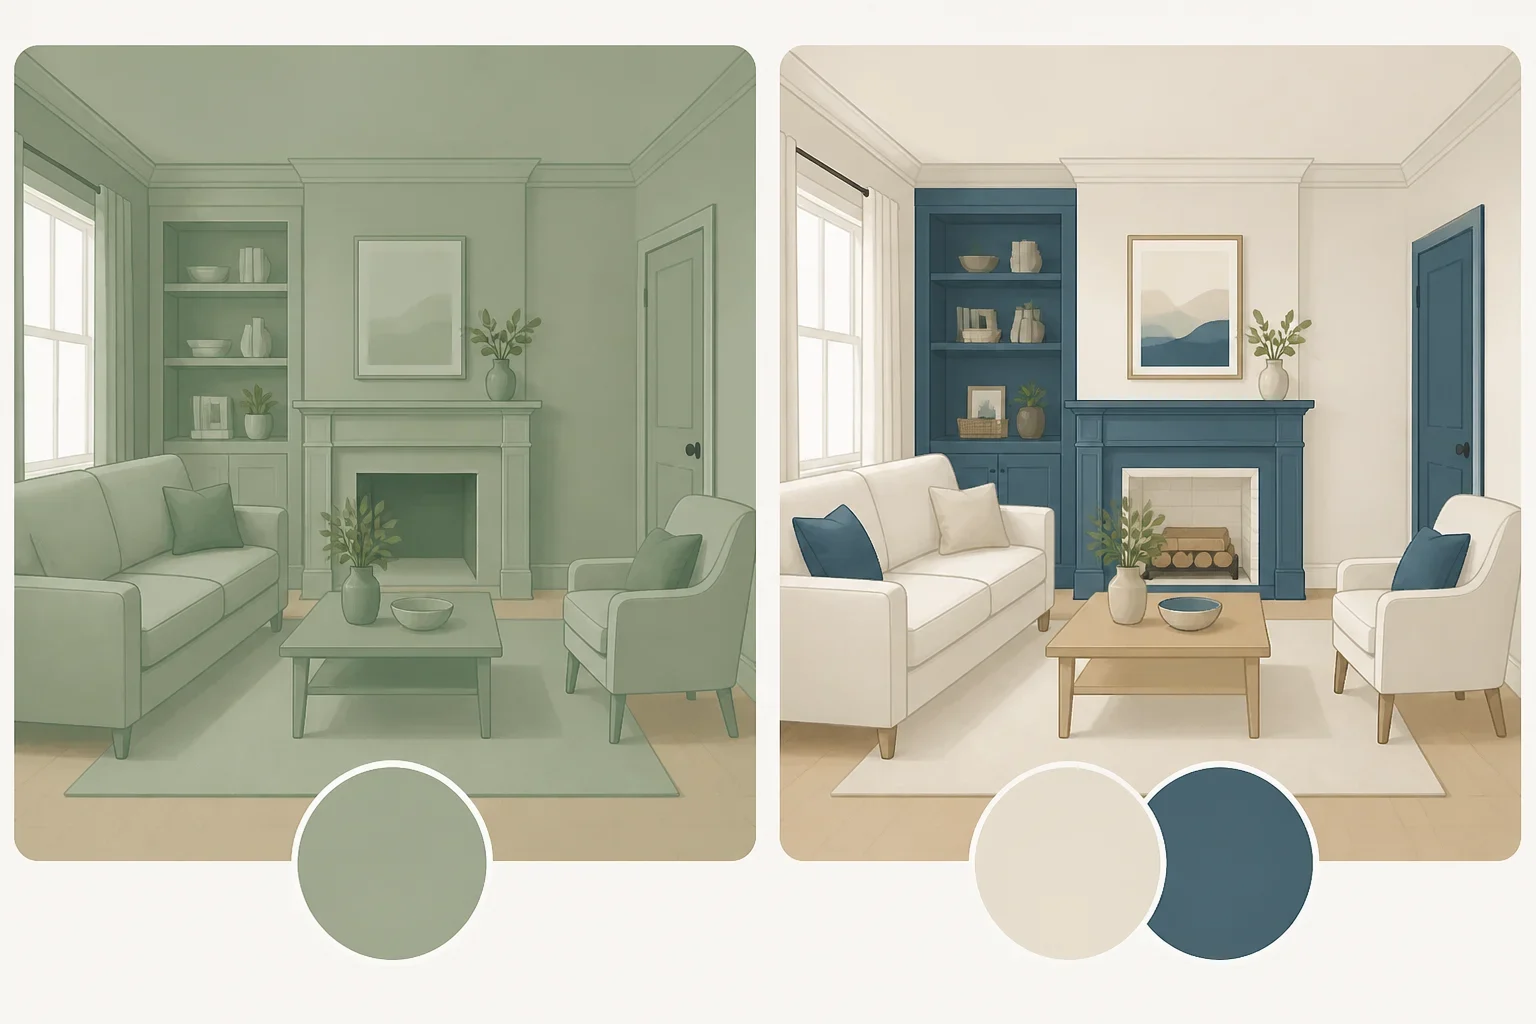
Start by choosing between two related approaches.
A strict drench uses one color across the walls, ceiling, trim, doors, and baseboards. Deep navy is one of PaintLikePro’s most popular choices, including Sherwin-Williams Naval, Benjamin Moore Hale Navy, and Farrow & Ball Stiffkey Blue. In a bedroom, that kind of saturation can create an enveloping, dramatic effect.
A layered palette keeps the walls and ceiling in one shade, then uses a second color on a single architectural or furniture feature. An Apartment Therapy case study published two years ago offers a useful example. Homeowner Sasha Faiz used Farrow & Ball Sulking Room Pink in the bedroom and Benjamin Moore Cascabel Chile on a wall-spanning wavy headboard. She described the finished space as “calm and inspired,” which was her experience of the room, not a universal rule about pink or burgundy (Apartment Therapy).
Choose the strict approach if the room needs a stronger, more cocooning mood and you like the idea of the architecture receding into one color. Choose the layered approach if you want the walls to feel quieter while concentrating visual weight behind the bed.
Light should influence the decision. PaintLikePro gives the example of an eight-foot ceiling receiving six hours of direct sunlight, where a lighter drenching color may be worth considering. If your room has a similar amount of sun, test a lighter shade before settling on the deepest color in a collection.
Gather materials and check the room first
A successful project begins before the paint arrives. Set aside:
- Paint for the ceiling, walls, trim, doors, and baseboards
- High-hide primer if the existing color is dark or uneven
- A 9-inch roller and extension pole
- A 2.5-inch angled brush
- Roller covers suited to the paint and surface
- Painter’s tape
- Drop cloths or furniture covers
- A putty knife and patching supplies
- Sandpaper or a sanding block
- Clean containers for paint and water
- Rags for drips and immediate cleanup
- A screwdriver for removing hardware and outlet covers
Protect the floor first, then cover furniture that cannot leave the room. Move lighter pieces out completely. Remove curtain hardware, switch plates, outlet covers, and wall décor so the paint line can run cleanly around the room.
Renters should confirm what the lease allows before buying paint, including whether the original color must be restored. In an older home, inspect the walls, trim, doors, and ceiling for peeling paint, water damage, cracks, or loose material. Do not paint over a surface that needs repair. If the condition of an older painted finish is uncertain, stop and get appropriate local guidance before disturbing it.
Open windows or use the room’s available ventilation according to the paint label. Keep the space clear while the coating dries, and do not sleep in the room until the product instructions allow it.
Test the color and estimate the paint
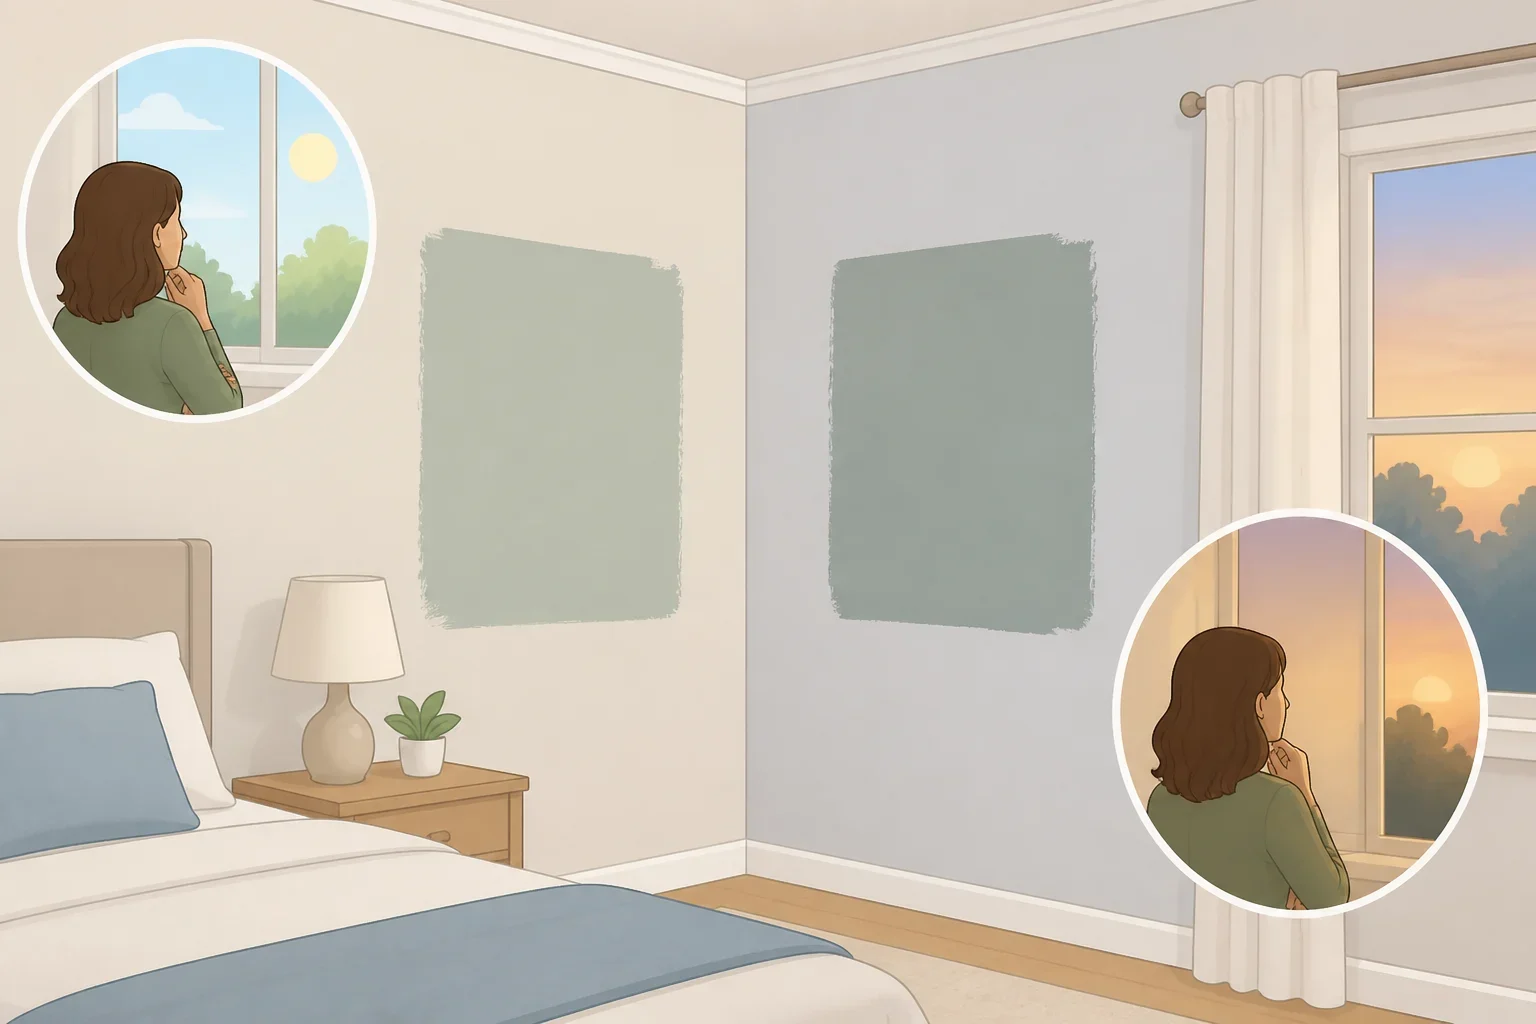
Do not choose a whole-room color from a phone screen or a small paper chip. Paint two 3-by-3-foot test patches on adjacent walls and live with them for three days, checking the color in morning and evening light. PaintLikePro notes that a deep shade can look bright in morning light and almost black later in the day, so the bedroom’s changing light matters more than a photograph.
If the test looks too heavy at night, move one step lighter before ordering the full amount. This is especially useful for a deep navy color drenched bedroom, where the ceiling and trim will carry the same visual weight as the walls.
Estimate the paint for all painted surfaces, not just the wall area. As a supplied example, a typical 12-by-12-foot room with eight-foot ceilings may need about 2 to 2.5 gallons for color drenching, compared with about 1.5 gallons for a standard wall-only paint job. That estimate accounts for the ceiling, saturated color, and waste, so measure your own room and use the paint manufacturer’s coverage guidance before purchasing. PaintLikePro recommends adding 25% to the calculator estimate for a practical cushion (PaintLikePro).
Buy the paint in one batch from the same manufacturer when possible. Separate batches of the same color can vary, and a difference that is barely visible on a sample can show across a ceiling and adjoining walls. Record the color name, finish, and batch information before leaving the store.
Prepare every surface before painting
Patch nail holes, dents, and cracks, then allow the patching material to dry before sanding it smooth. Clean dusty or marked surfaces and let them dry. Remove baseboards with a putty knife if they can come off without damaging the wall. PaintLikePro says this approach takes about 30 minutes and can produce a cleaner finish than trying to tape around the boards. If removal would damage fragile plaster, old trim, or a rental wall, leave the boards in place and take extra time with the tape.
Prime dark or uneven existing colors before applying the topcoat. PaintLikePro reports that one coat of high-hide primer, such as KILZ Original or Zinsser BIN, can reduce the number of topcoats needed from four to two. Follow the primer label for drying and ventilation instructions rather than rushing directly into color.
Tape carefully around glass, hardware, and surfaces that will not be painted. A deliberate taping session is easier than scraping dried paint later. Protect flooring at the wall edge even when the baseboards will receive the same color, because drips can still travel beneath the roller.
Paint walls, ceiling, trim, and baseboards in order
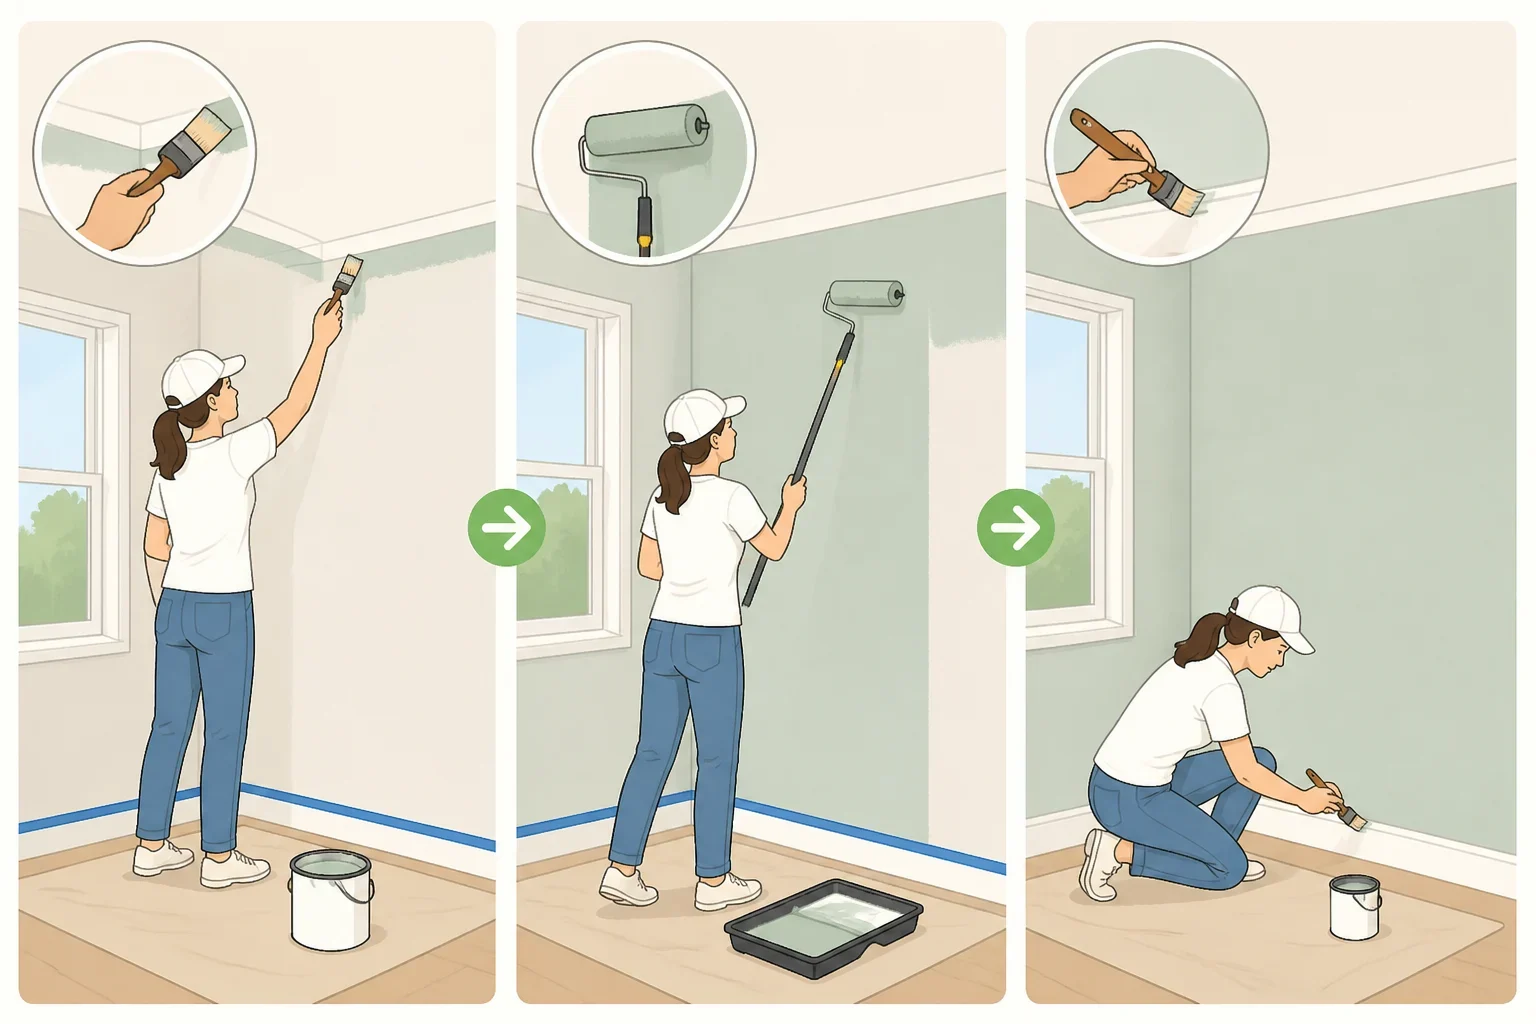
Follow this sequence:
- Paint the ceiling. Use the selected ceiling finish and work in manageable sections. Keep a wet edge so lap marks do not build up.
- Paint the walls. Cut in around corners, the ceiling line, doors, windows, and other edges with the angled brush. PaintLikePro recommends a 3-inch cut-in band and working in 4-foot sections so the edge does not dry before the roller reaches it. Use the 9-inch roller on an extension pole, working in roughly 3-by-3-foot sections. Roll in a “W” pattern, fill in the open areas without pressing hard, and let each section dry enough to reveal coverage gaps before moving on (PaintLikePro).
- Paint the trim and doors. The color stays the same, but the sheen can change how the surface catches light. A workable schedule is flat acrylic on the ceiling, eggshell on the walls, and satin or semi-gloss on trim and doors. Another standard approach uses matte on walls and satin on trim. Product labels vary, so choose compatible finishes from the same paint system and use the manufacturer’s recommendation if it differs.
- Paint the baseboards last. Match the baseboard color to the walls, using the finish selected for that surface. Painting them after the walls lets you cover the lower edge neatly without repeatedly bumping freshly painted boards.
- Apply the second coat. Saturated colors especially need two coats for even coverage. Do not judge the final color from the first coat, even if the room looks covered while the paint is wet.
Latex paint may be dry to the touch in two to four hours, but that does not mean it has cured enough for furniture or heavy use. PaintLikePro recommends waiting at least seven days before moving furniture back and allowing seven to 14 days for a full cure. In humid conditions, add another three to five days (PaintLikePro). Use felt pads or lift furniture rather than dragging it across the new finish.
Choose one focal feature that fits the room
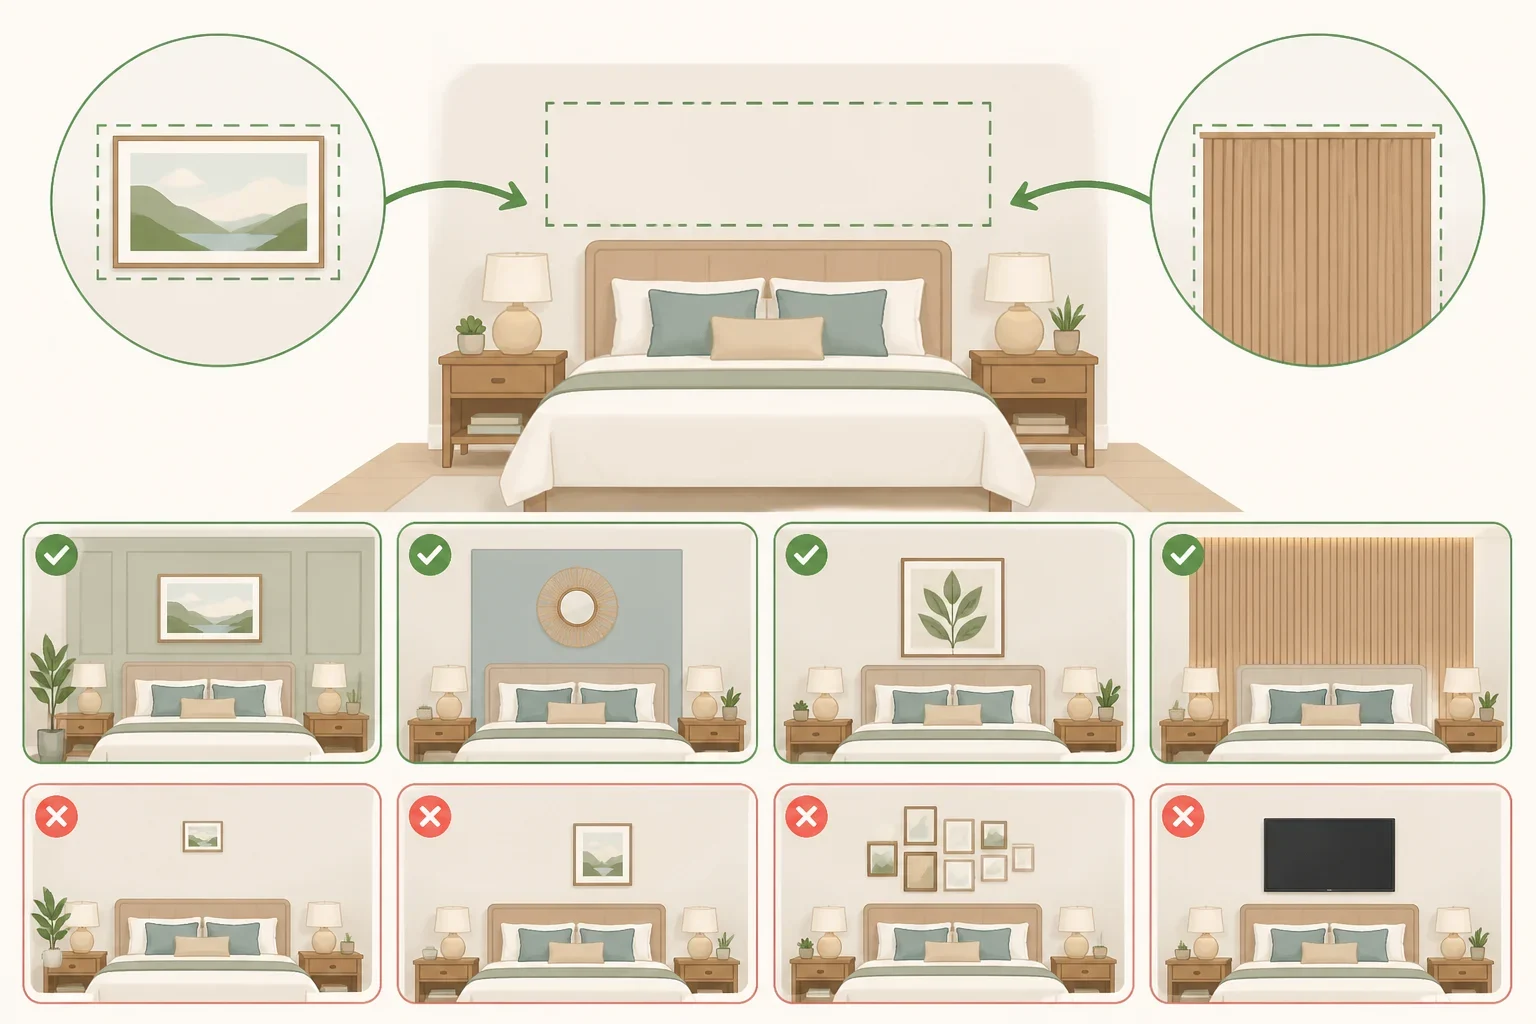
A focal feature is optional. The paint can stand on its own, especially in a small room with strong architectural details. If the space still feels visually unfinished after the color is chosen, use this simple framework:
- Choose a headboard if the bed wall needs softness, height, or a clear anchor. A ready-made upholstered headboard is the least complicated route for renters or anyone who does not want to cut and mount a large piece.
- Choose large art if speed and flexibility matter most. Center one substantial piece over the bed rather than adding several competing small elements.
- Choose a painted panel or trim treatment if the room needs architectural emphasis without a furniture-building project. Keep its shape and placement deliberate so it reads as part of the wall.
- Choose a custom headboard only if measuring, cutting, mounting, and checking the wall construction are within your skills and available tools.
The Apartment Therapy project used plywood, a jigsaw, pre-made floating nightstands, paint, and built-in sconces. Faiz reported that the headboard alone cost about $600, a project-specific figure rather than a general DIY budget. The piece spanned the wall and created a focal point, while the room’s larger makeover also included an IKEA PAX wardrobe with REINSVOLL doors in gray-beige. Trim around the wardrobe and Benjamin Moore Baja Dunes helped it read as built-in (Apartment Therapy).
For a custom piece, verify the wall and follow the mounting hardware manufacturer’s instructions for that wall type. Do not borrow weight limits or hardware specifications from another project. Plug-in sconces can avoid new wiring, while hardwired fixtures require checking local code and using a qualified electrician where required.
Finish the project in the right order
Test two adjacent walls for three days, then confirm the sheen and calculate coverage for every surface. Buy enough paint from one batch, prepare the room fully, and paint from ceiling to walls to trim, doors, and baseboards. Allow the finish to cure before returning furniture.
Choose the focal feature only after the paint direction is settled, but before ordering major furniture. That sequence keeps a headboard, art, or panel treatment from competing with the color, and it leaves room to choose the simpler option if the freshly painted bedroom already feels complete.
