
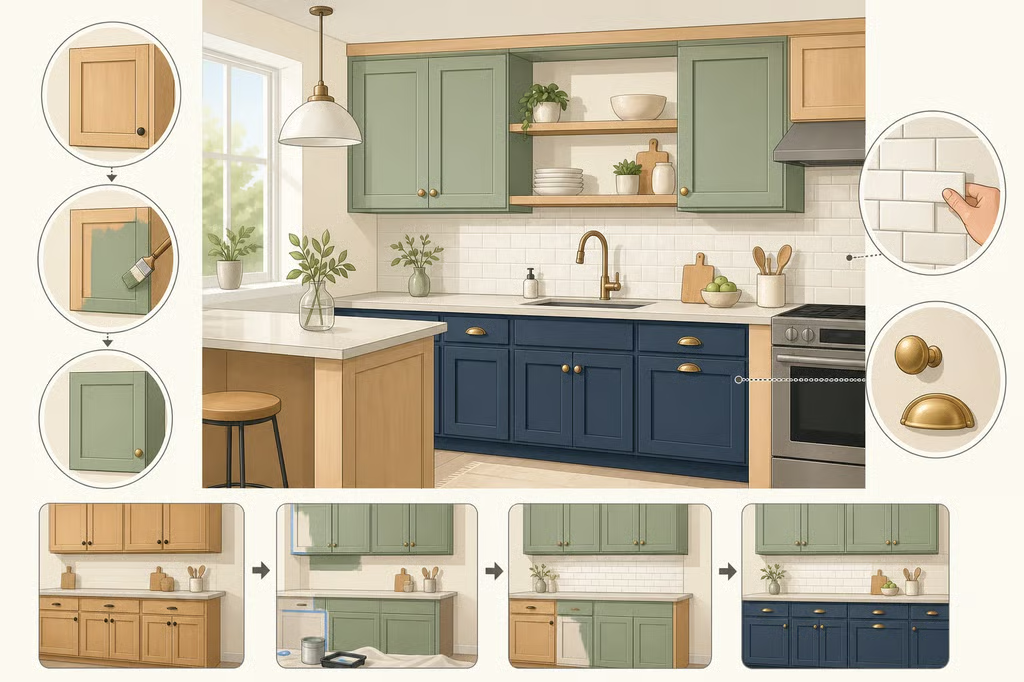
Colorful Kitchen Ideas with Maple Cabinets: Budget Approaches
The best colorful kitchen ideas with maple cabinets keep the wood’s warmth while adding contrast through paint, tile, hardware, or one carefully chosen painted zone. Before buying supplies, decide whether the real problem is the maple, the surrounding finishes, the layout, or the amount of change the household can manage.
That diagnosis matters. A cabinet color can refresh a tired-looking room, but it cannot create storage or repair a frustrating work path. This guide walks through three practical approaches, from keeping the maple intact to redesigning the room, then shows how to build a palette and test it before spending on materials.
1. Diagnose the problem before buying paint
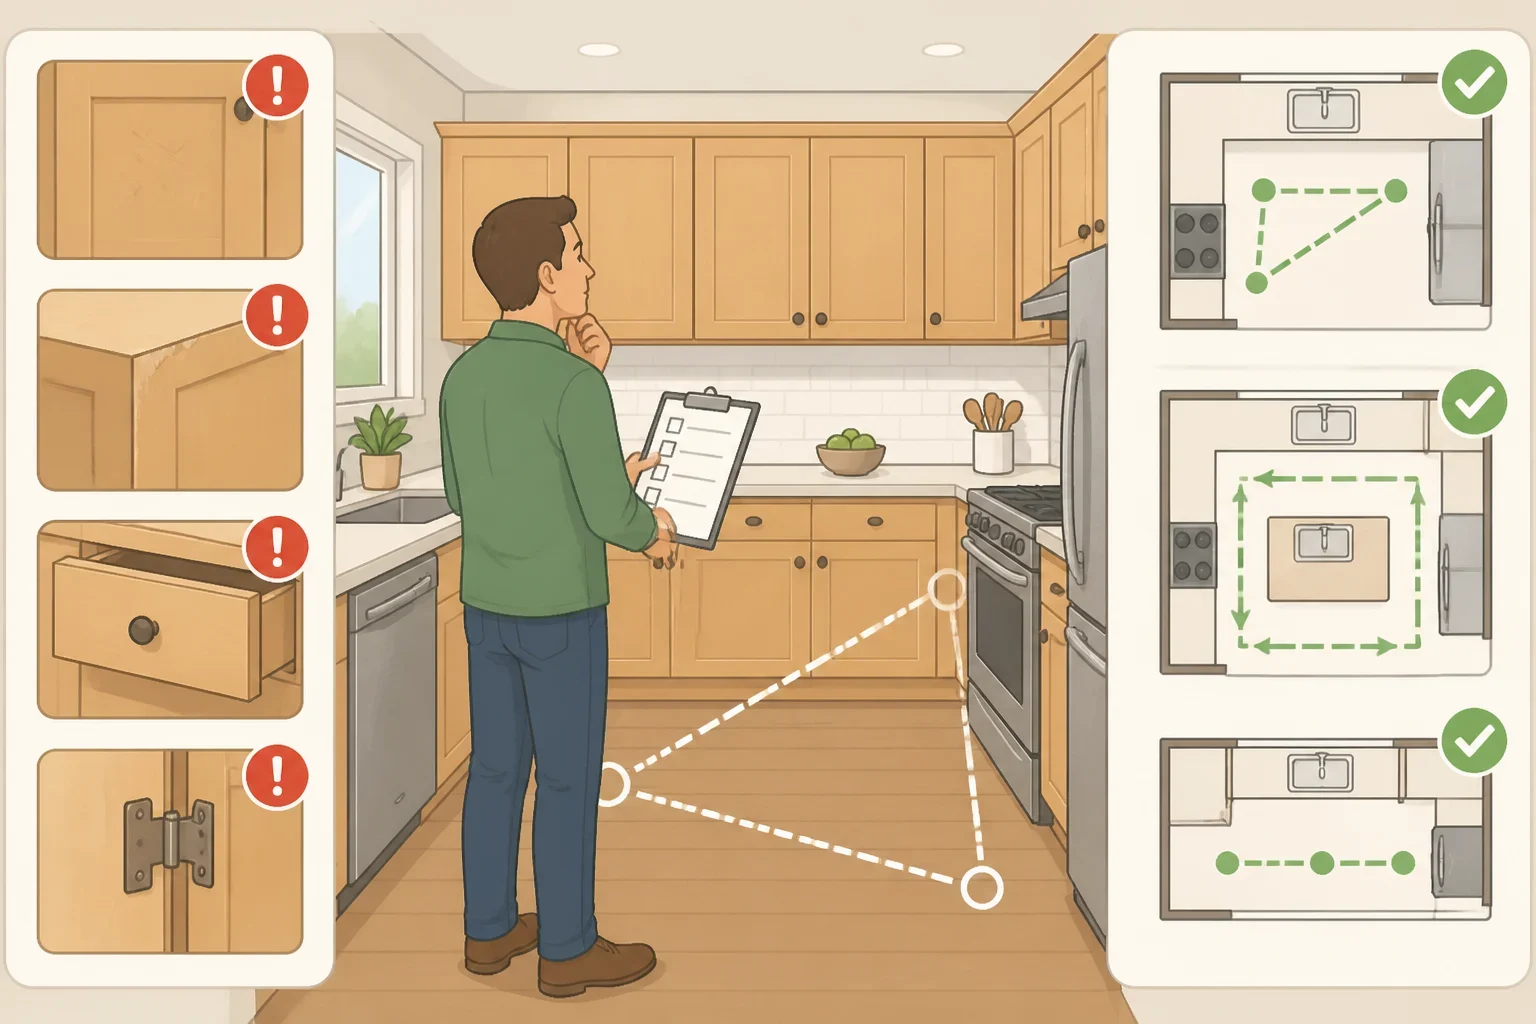
Start by naming the complaint. Is the kitchen too orange? Do the cabinet doors look worn? Is there nowhere to put small appliances? Does the island interrupt the path between the sink, refrigerator, range, and dining area?
Those problems need different fixes. A wall color may soften a strong wood-and-floor combination, but it will not improve circulation. New cabinet paint may change the mood, but it will not add storage.
Look at the maple beside the floor, counters, backsplash, and appliances before deciding it has to go. In a Montreal kitchen, designer Sabrina Barazin selected medium-stained maple because she wanted substantial wood with visible grain, as Architectural Digest reported about three years ago. That example is useful when a kitchen feels dated: the surrounding finishes may be the problem, not the cabinet material.
Inspect the doors and cabinet boxes:
- Look for peeling, bubbling, lifting edges, swollen areas, or cracks.
- Check whether the finish appears consistent from door to door.
- Open and close several doors to identify loose hinges, sticking drawers, or alignment problems.
- Compare the maple with the floor and counter in both daylight and artificial light.
- If the coating is unknown or damaged, stop before stripping or sanding. Get a cabinet refinisher’s assessment first.
Then examine the floor plan. A Brookline renovation published by Architectural Digest five years ago involved a 250-square-foot kitchen whose designers removed walls, improved sightlines, and turned a hidden stair into stepped cabinets for a refrigerator and pantry. That project is not a template for every small kitchen. It is a reminder that a layout or storage problem should be addressed before a color problem.
If the cabinets and layout work, move to the least disruptive option. If they do not, settle the floor plan before choosing a permanent palette.
2. Choose how much change you can live with
These three approaches sort the decision by disruption and commitment. The right choice depends on the condition of the cabinets, the rest of the room, and how long the household expects to stay.
Approach A: Keep the maple and move color around it
This is the sensible starting point when the cabinet doors and boxes are sound. Add color through a wall, breakfast nook, backsplash, open-shelf backing, runner, artwork, or lighting. An adjoining dining area can carry a stronger accent while the kitchen remains calmer.
A nearby room can also help balance the wood. In Barazin’s Montreal project, the kitchen kept its medium-stained maple fronts while the dining cabinetry received a contrasting color. The designer related the dining cabinet color to the kitchen floor and the wood to the dining area, creating what she described as a “yin-yang” relationship, according to Architectural Digest.
This approach is easier to change than a full cabinet renovation, but it is not all-or-nothing. Paint and textiles are simple experiments. Tile, shelving, lighting, and adjoining cabinetry require more planning and may leave holes or other permanent changes. Try the reversible pieces first, then decide whether the room needs a larger commitment.
Approach B: Change one zone
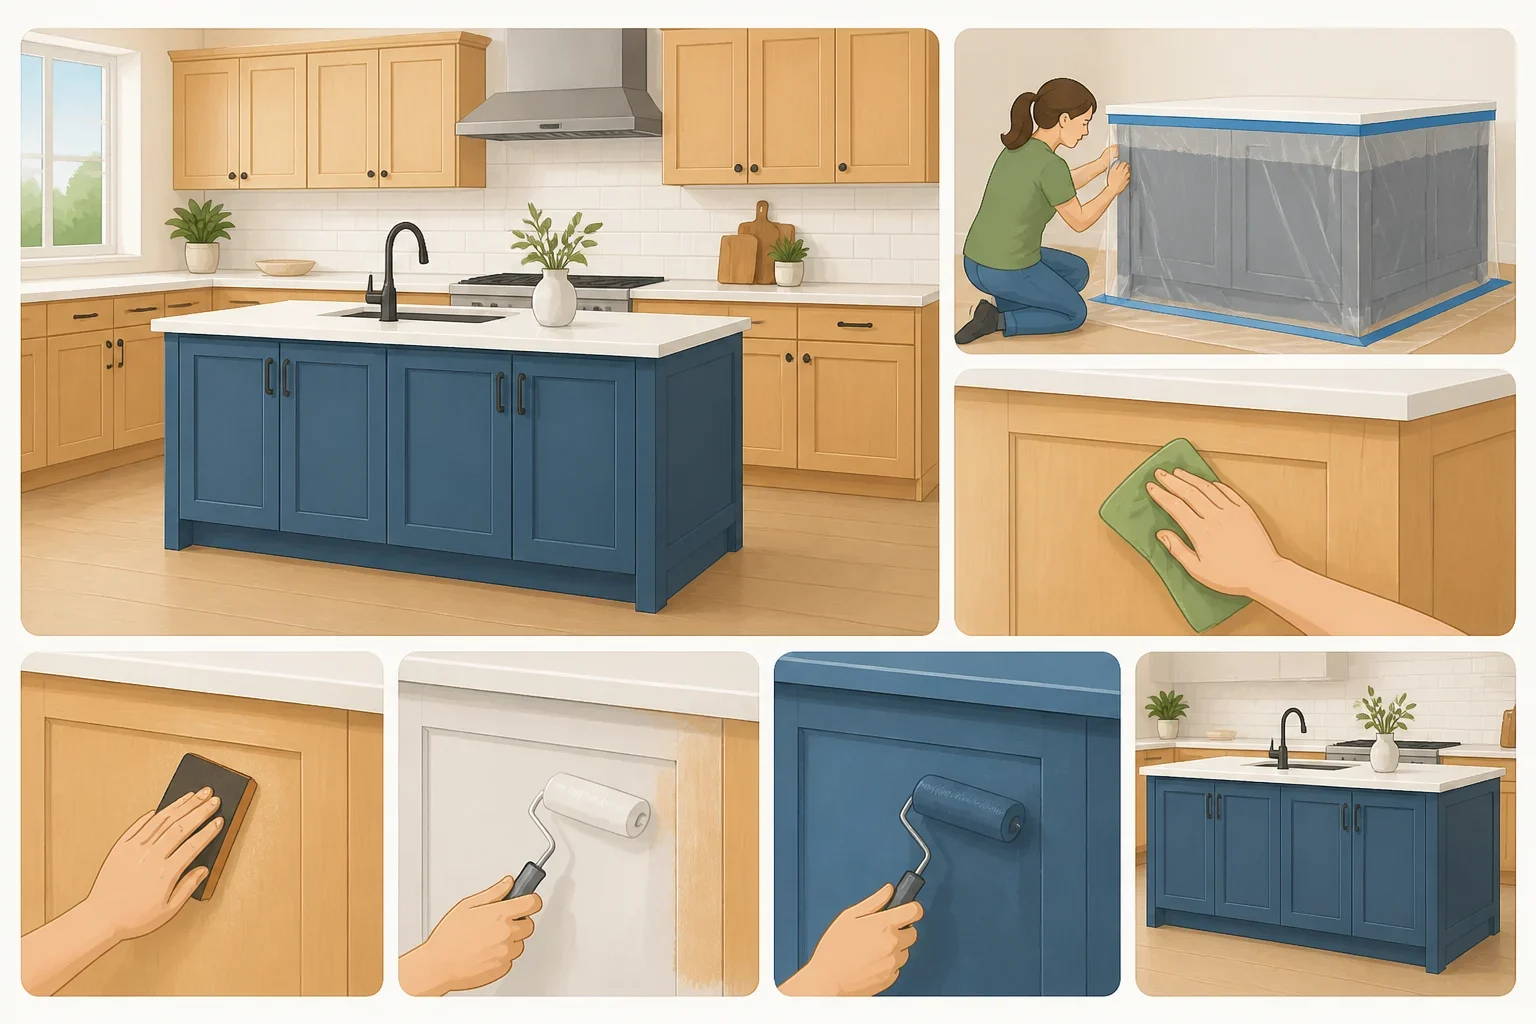
A painted island, a run of lower cabinets, or open shelving can break up a large field of maple without changing every cabinet. This works when the wood is in good condition but the kitchen feels too uniform.
Treat the painted area as a real cabinet project, not a casual weekend touch-up. The surface may need thorough cleaning, appropriate deglossing or abrasion, compatible primer, and a durable finish. Doors and drawer fronts can require removal, labeling, degreasing, spraying, and curing before they go back into daily use.
If the cabinet finish is unfamiliar, a professional refinisher is the safer choice. Do not assume that a paint labeled for walls will adhere properly to a cabinet surface or withstand constant handling.
A homeowner featured by Apartment Therapy had professionals paint her maple cabinets and installed antique-gold handles herself. The kitchen upgrade took about a week, as Apartment Therapy reported last year. That is a case-study timeline, not a promise for every project.
An island is a useful test zone because it can become the focal point while the perimeter cabinets remain unchanged. If the new color feels too strong, the scope is still contained.
Approach C: Redesign the room
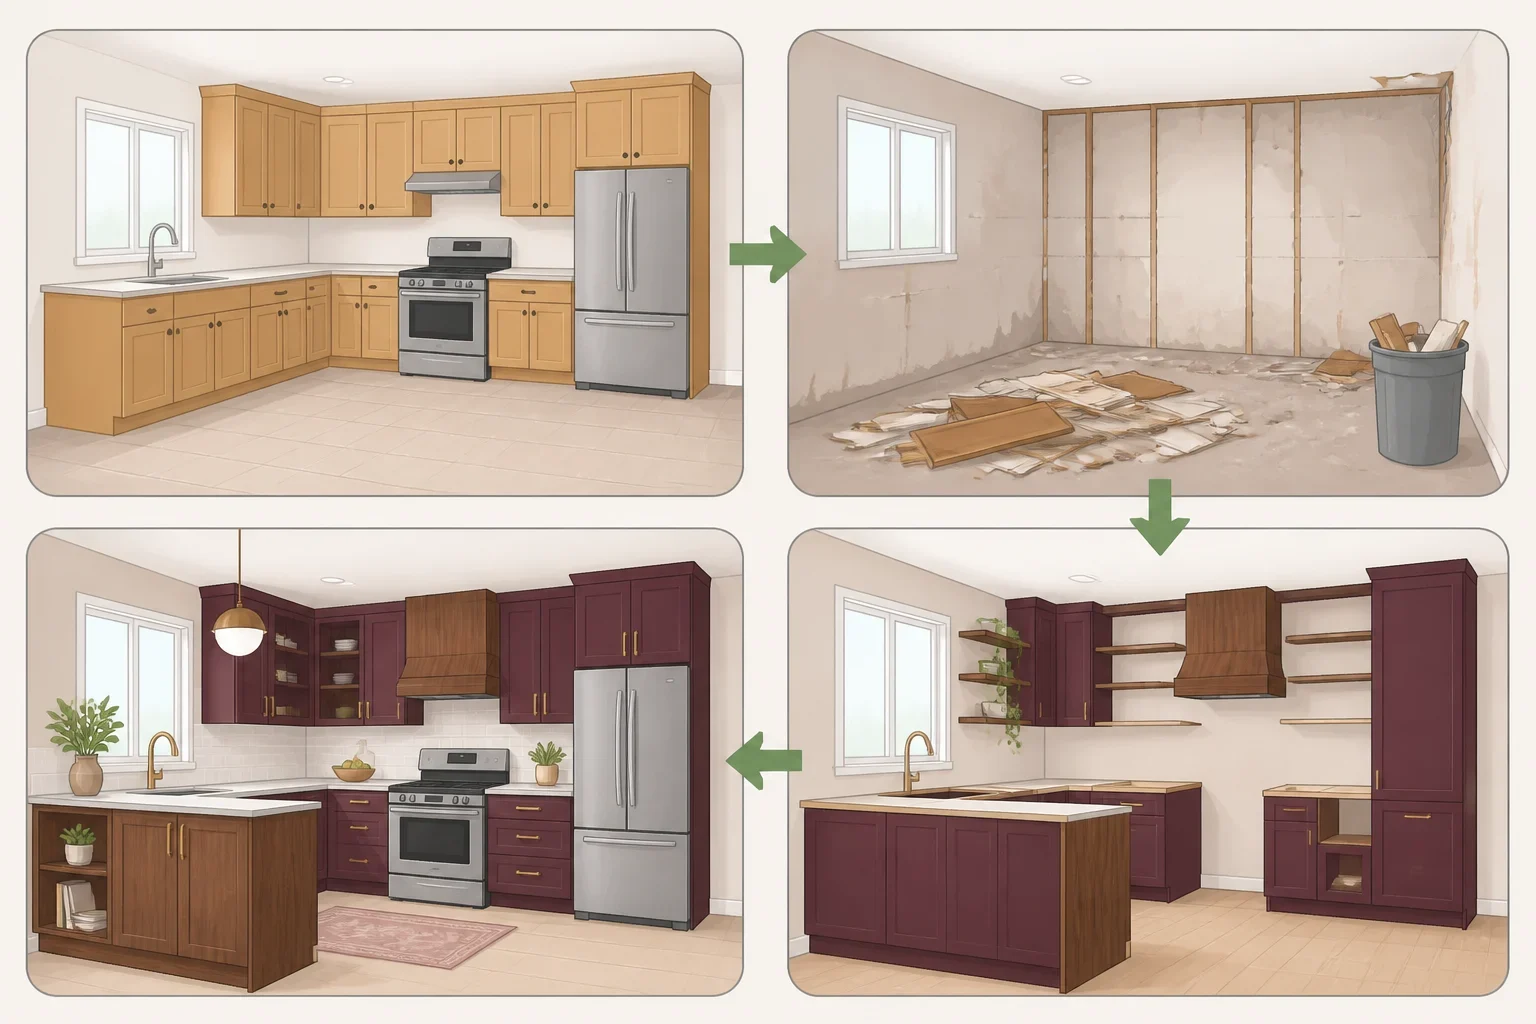
Choose a larger renovation when layout, storage, cabinet condition, and overall style need to change together. A full reset may involve cabinetry, counters, backsplash, lighting, appliances, and circulation. It should not be chosen simply because the maple feels unfashionable.
The Brookline case study shows why color and function are often planned together. Its cabinet fronts used rust, ochre, night, and mint, but the renovation also reclaimed hidden space and improved how the kitchen connected with the rest of the home. The designer said it took many iterations to arrange the four colors so they looked complementary and purposeful, according to Architectural Digest.
That is a useful warning for a DIY palette. Several bold cabinet colors can work, but the arrangement matters as much as the colors themselves. Without a clear plan, one strong accent is easier to manage than four.
3. Build a palette that suits natural maple
The exact maple finish changes the result. Medium-stained maple will behave differently from a pale, clear finish, and the floor or counter can make the wood appear warmer or cooler. Always sample the complete combination rather than judging paint by itself.
Start with a pattern or material you already like. A tile sample, wallpaper, runner, fabric, or piece of art can provide several related colors before a paint can is opened. This is more reliable than choosing a color from a tiny chip and hoping it will coordinate later.
For color schemes for natural maple cabinets, consider these directions:
- Blue-green: A blue-leaning green can provide contrast while keeping the room grounded. In the Apartment Therapy makeover, the homeowner switched from an olive-leaning option to Sherwin-Williams Agate Green because she wanted more blue. She said the color looked different in every type of light.
- Deep berry: A saturated berry or wine tone can create a dramatic focal point. Use it on an island or lower cabinet run if painting the entire kitchen feels like too much.
- Muted terracotta: A warm terracotta can echo maple’s warmth without matching it exactly. Apartment Therapy reported that Sherwin-Williams Windswept Canyon, described as a warm orange with terracotta character, complemented the green cabinetry in that kitchen.
- Charcoal: A dark neutral can give warm wood a sharper edge. Try it on an island, hardware, or lighting before committing to dark cabinetry throughout.
- Warm white: A warmer white can brighten the room without the hard contrast of a cool white. Test it beside the floor and counter, since those surfaces will affect how the white reads.
A dependable starting framework is one dominant wood tone, one main color, and one supporting neutral. It is a guide, not a rule. If the floor, counter, or backsplash already has a strong pattern, count it as part of the palette before adding another competing finish.
4. Test the color in the actual kitchen
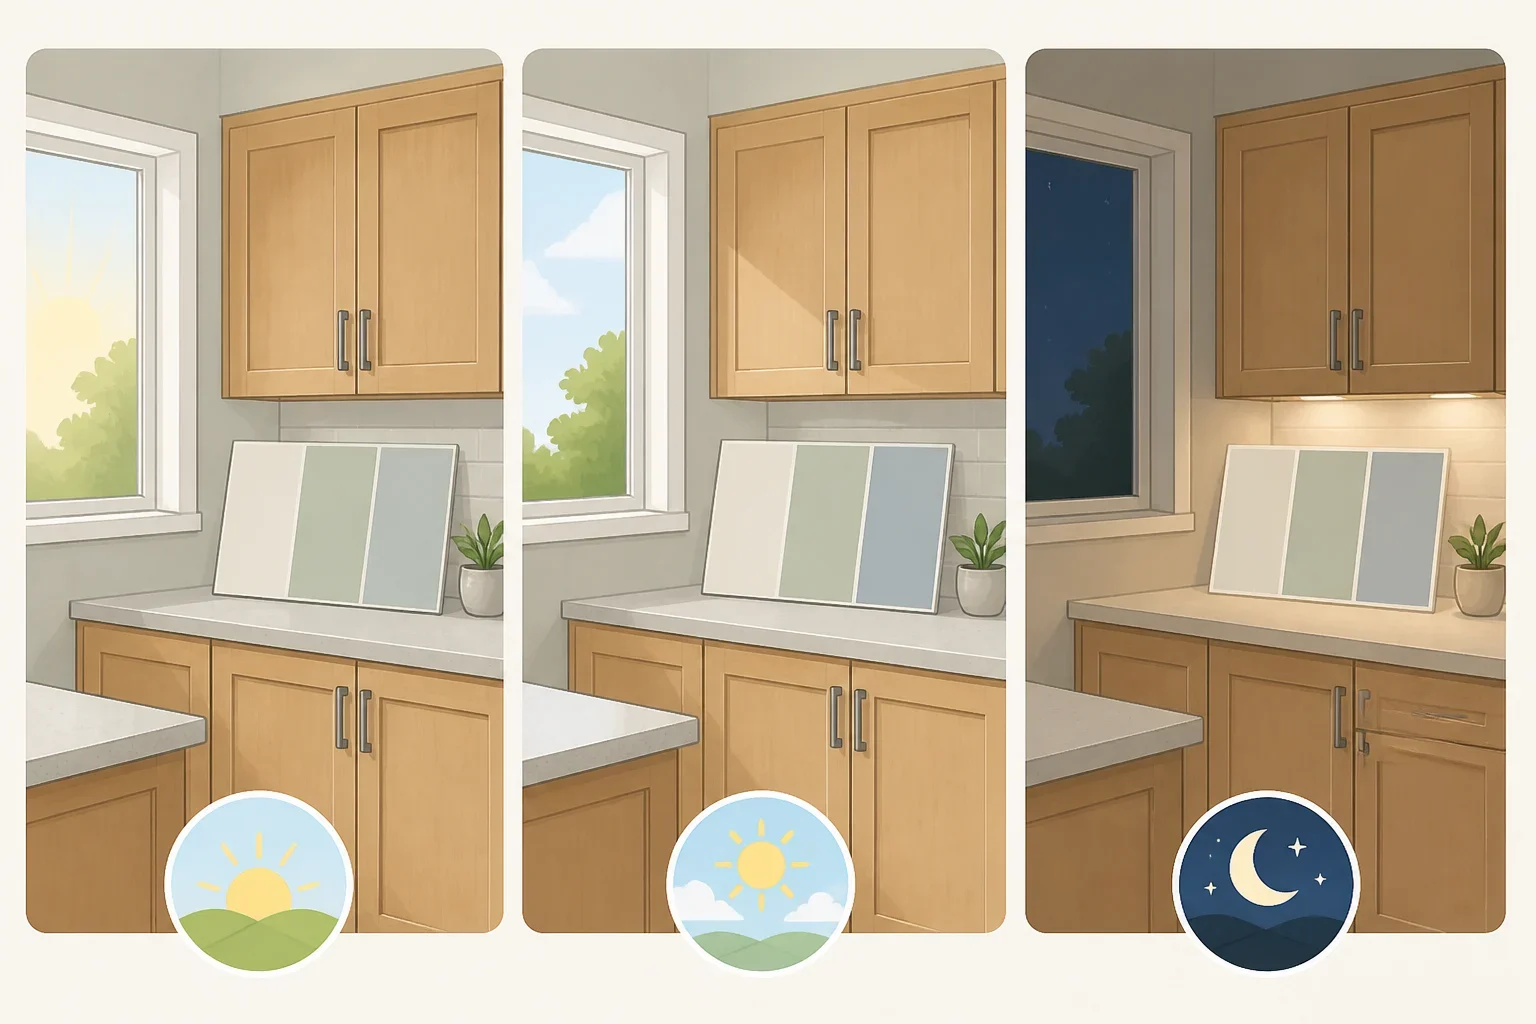
Make large sample boards or use removable samples. Place them beside the maple, countertop, floor, backsplash, and appliances, rather than testing them on an empty wall.
Check the samples:
- In morning light
- In the afternoon
- After the kitchen lights come on
- Near a window and in a darker corner
- Beside the exact cabinet finish you plan to keep
Leave the samples in place through more than one part of the day. The Agate Green makeover is a good reminder that a shade can shift noticeably with changing light. A color that looks calm in a store may feel much stronger beside warm maple at night.
Use the same process for wallpaper, tile, and countertop materials. Tape a backsplash sample beneath the cabinets. Hold a counter sample beside the floor. For hardware, tape or temporarily hold sample pulls in place and check the existing hole spacing before ordering a full set.
5. Add the bridge pieces last
Once the main color is settled, choose the elements that connect it to the wood. Hardware, lighting, counters, and backsplash should support the palette rather than introduce unrelated finishes.
Hardware is a reasonable first change when paint still feels premature. The Apartment Therapy makeover paired the green cabinets with antique-gold handles, which the homeowner installed herself. Hardware does not solve a layout problem, but it can give older doors a clearer design direction without changing the wood.
If counters are part of the plan, compare materials beside the cabinet sample. In a maple-kitchen update covered by Kylie M Interiors, the homeowners chose Formica Soapstone Sequoia, designed to mimic a lighter, warmer soapstone, instead of quartz. The homeowner said the laminate saved thousands of dollars and left room for other choices. That saving belongs to that case study, not every laminate installation.
For a backsplash, choose a color and pattern that still feel comfortable after the initial excitement fades. The same case study described its backsplash as having “a wink of timelessness.” Bring home a tile sample and check both the tile and grout beside the maple and counter before ordering.
Follow manufacturer care instructions for specialty stone, laminate, factory finishes, and painted surfaces. If the cabinet coating is peeling, unknown, or difficult to identify, have a professional handle the refinishing rather than guessing at preparation.
The practical decision is simple: preserve the maple and add one strong color if the room mostly works; paint one zone if the kitchen needs a focal point; or plan a full redesign when the layout, storage, and budget support it. Start with samples, not a gallon of paint. That pause can keep a warm wood kitchen from becoming an expensive color correction.
