
How to Plan a Renter-Friendly Colorful Bathroom Makeover
A renter-friendly colorful bathroom makeover does not have to begin with removing tile or replacing a vanity. Start by deciding which changes can come back out without leaving damage, then build color around what must stay. This guide helps you choose between a reversible refresh, a cosmetic vanity update, and a renovation-level project before you spend money or touch the plumbing.
Before shopping, check the lease, inspect the room, measure the existing setup, and separate decorative spending from installation work. A peel-and-stick wallpaper bathroom makeover may be manageable with approval, while an IKEA bathroom vanity hack involving wall anchoring, a new countertop, or plumbing changes belongs in a different category.
Choose your makeover level first
Use the least permanent option that can give the room the change you want. A colorful bathroom makeover can happen in stages, and the first stage does not need to involve the vanity.
1. Start with a reversible renter refresh
Choose this route when the lease limits painting, adhesive products, hardware changes, or plumbing work, or when the bathroom has an existing vanity you do not want to disturb.
Build the color through items that can leave with you:
- Shower curtains and bath mats
- Towels and washable textiles
- Freestanding art that does not require new wall anchors
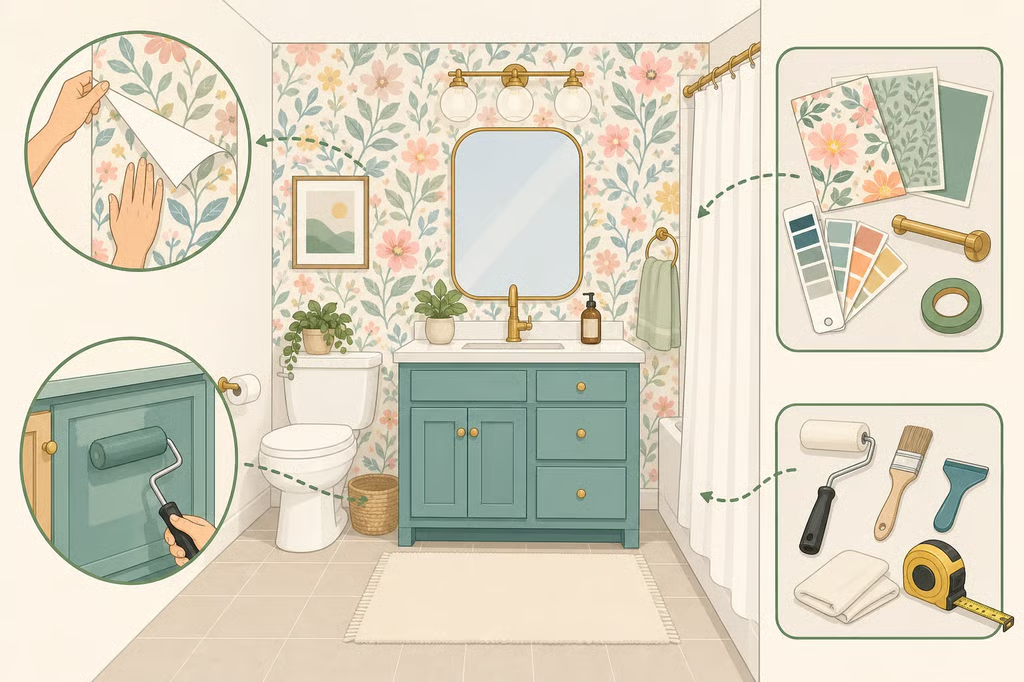
- Removable wallpaper, after checking the lease and the product’s moisture guidance
- Switch-plate covers and cabinet hardware, if the original pieces can be stored safely
- A mirror or lighting change that does not require rewiring or permanent alteration
A strong palette can make an immovable feature feel intentional. Pair the existing tile or countertop with one dominant color, then repeat that color in smaller pieces rather than adding several unrelated shades.
Wallpaper needs more care in a bathroom than it does in a dry room. Clean the wall thoroughly, work around bumps and doorframes, and pay close attention to seams, corners, and the area near the sink. Keep the packaging and care information in case the landlord asks what was installed.
Adhesive wallpaper is not automatically damage-free. Test a small area only if the owner approves, and do not cover peeling paint, soft drywall, staining, or lifted caulk. Those signs need inspection before decoration.
2. Make a cosmetic vanity update
This middle option works when the vanity stays in place but the lease or owner’s approval allows more involved changes. Painting cabinet doors, attaching trim, replacing a countertop, or recaulking seams can be difficult to reverse cleanly, so get written permission before beginning in a rental.
Keeping the existing cabinet is often the simplest way to create an IKEA bathroom vanity hack look without replacing the whole unit. A fresh color, new pulls, and a mirror can change the focal point while leaving the plumbing and cabinet footprint alone.
For paint, remove doors, hinges, and knobs when possible. Clean and degrease the surfaces, sand them, remove the dust, then apply thin coats. If the doors have recessed panels, use an angled brush around the edges and a lint-free roller across the flat areas. Thin coats help avoid an uneven finish.
Trim can add dimension, but glued pieces are not renter-safe by default. They may pull away paint or damage the cabinet surface when removed. Treat glued trim, new countertops, and fixture changes as semi-permanent work, not as a casual weekend update.
3. Treat a vanity replacement as a renovation
Removing the existing vanity or installing a new one changes the scope immediately. The work may affect the wall, water connections, sink, countertop, flooring, and caulk lines. It also leaves the bathroom without its usual storage while the old unit is out.
An IKEA HEMNES vanity cost $388 in an approximately $892 whole-bathroom project documented by Eliza Morrill Home two years ago. That project also involved repairing plaster, replacing a toilet, laying tile, installing lighting, and painting, so the total is a case-study budget rather than a vanity price promise.
For a renter, this level requires written permission before work begins. For a homeowner, it still starts with measurements, an inspection, the exact product manual, and local requirements. Plumbing or electrical work that falls outside the project’s skill level belongs with a qualified professional.
Complete the pre-project checklist
Do not buy wallpaper, paint, trim, or a sink until these checks are complete.
- Read the lease. Look for rules covering paint, adhesive products, caulk, hardware, wall anchors, lighting, plumbing, and fixture replacement. If the language is unclear, ask the landlord or property manager for written approval that names the specific work.
- Inspect the walls and vanity. Look for peeling paint, soft drywall, lifted caulk, staining, or movement around the existing cabinet. A decorative update should not cover a moisture problem.
- Check moisture exposure. A bathroom wall near a shower or tub needs a product and installation method suited to that environment. Plan how the wallpaper or paint will meet trim and fixtures before applying anything.
- Locate the existing plumbing. Note where the supply lines, drain, shutoff valves, and sink connections sit before considering a new vanity. If the new unit does not align with the existing connections, stop before disconnecting anything and ask a qualified professional to assess the work.
- Measure the footprint. Record the vanity’s width, depth, and height, along with the distance to the toilet, tub, door, and adjacent walls. Measure the wall space for a mirror and note whether the floor continues beneath the existing cabinet.
- Check the wall type. If a vanity, mirror, shelf, or cabinet must be anchored, identify whether the wall is drywall, plaster, masonry, or another material. The required fixing device depends on the wall.
- Confirm the countertop plan. A replacement top must fit the cabinet and accommodate the sink and faucet. If stone is involved, have the fabricator or manufacturer confirm the dimensions, support requirements, cutouts, and installation method.
- Separate the budget. Create lines for removable décor, wallpaper or paint, vanity materials, sink and faucet, countertop, tools, safety equipment, labor, permits, and contingency. Keep cosmetic spending separate from plumbing and installation costs.
Build color around what cannot change
The most renter-friendly design decision is often accepting the room’s existing tile, floor, or countertop instead of trying to disguise every surface. Pick one dominant color relationship, then repeat it in smaller ways.
Blue tile with pink accents is one possible direction. Green cabinetry with white walls is another. A custom pale bluish-gray was used in the Eliza Morrill Home renovation, but that project involved a full bathroom update. Use these examples as palette references, not proof that one formula will suit every room.
Hardware offers a smaller commitment. Store the original knobs, pulls, mirror, and switch plates in a labeled bag, and reinstall them before moving out if the lease requires it. A new mirror or wall light may look simple, but anchoring and electrical work are not decorative-only tasks. Use existing mounting points where possible, and get qualified help when wiring is involved.
Use an IKEA bathroom vanity hack only with permission
An IKEA vanity can be a useful design base, but the model matters. The instructions for the ÄNGSJÖN/BACKSJÖN combination say the unit must be secured to the wall, with fixing devices selected for the specific wall material and purchased separately. The installation must also follow local building and plumbing regulations, and silicone is needed but not included, according to IKEA’s product guidance from two years ago.
That guidance does not automatically apply to the Godmorgon vanity used in The Sorry Girls’ project or to every other IKEA model. Find the manual for the exact unit before ordering a countertop, sink, or hardware. The same IKEA product lists a maximum countertop thickness of 50 mm, or 2 inches, so a thicker stone top should not be treated as a drop-in replacement.
The advanced version of this project began with a thrifted IKEA Godmorgon vanity. The builders added ash wood, travertine sourced from stone offcuts, wood glue, screws, stain, and custom trim, as documented by The Sorry Girls two years ago. The materials included a table saw, circular and miter saw, wood planer, sanding block, drill, screws, and a diamond blade for stone cutting.
The sequence matters:
- Mount the cabinet according to the exact manufacturer instructions. Do this before adding custom trim. Wall support is part of the installation, especially when the cabinet will carry a sink and countertop.
- Plan the trim around the drawer movement. Custom pieces need to clear the cabinet frame and hardware. Test the drawer before gluing anything in place.
- Prepare and test the wood. The Sorry Girls chose ash for its stain absorbency and affordability, then planed rough lumber to the desired thickness. Test the stain on scrap wood before applying it to the finished trim.
- Attach the trim securely. Glue the pieces to the drawer fronts, then add screws from the back of the drawer front for extra support. Sand the edges until they are smooth.
- Treat stone cutting as specialist work. The documented project used a diamond blade and a steady stream of water during the cut to limit airborne dust and produce a cleaner edge. Stone cutting involves power tools, water, and a heavy workpiece. A stone fabricator can confirm the cutouts, thickness, support, and finish.
- Plan plumbing separately. A bowl sink, faucet, and drain may require changes that are not covered by cabinet assembly instructions. Do not disconnect water lines or alter the drain simply because the new pieces appear to fit.
For a lower-tool version, keep the existing vanity and change the visual details instead. New pulls, a framed mirror, approved paint, wallpaper, or colorful textiles can create a custom feeling without cutting wood or stone.
Price the project without confusing case studies
Use project totals to understand how scope changes, not to set a universal expectation.
A powder-room renovation documented by Domino two years ago came in at just under $3,000, excluding a $680 pendant light received for free. Its listed items included a $350 IKEA vanity, $250 faucet, $148 sink, and $80 for four drawer pulls. Those figures belong to a specific homeowner renovation with a specific room and finish plan.
Build the estimate in categories instead:
- Removable décor and hardware
- Wallpaper, paint, primer, and approved caulk
- Vanity trim or cabinet materials
- Countertop, sink, faucet, and drain
- Tools and safety equipment
- Labor, permits, and professional installation
- Contingency for surprises
Stop the cosmetic work if you find active water damage, a leaking valve, mold, soft substrate, or plumbing that does not match the planned fixture. In the Domino renovation, a burst valve spread water through the bathroom and basement ceiling, and preexisting mold damage came with a reported $30,000 repair cost. That example is not evidence that every vanity hides damage. It is a reason to inspect first and avoid covering a problem with paint or wallpaper.
Choose the right path before shopping
Renters should begin with the reversible color layer: textiles, stored hardware swaps, approved wallpaper, and décor that works with the tile already in place. If adhesive, paint, caulk, or wall anchors are involved, get written permission before starting.
Renters with approval, and homeowners who have inspected the space, can consider a cosmetic vanity update. Keep the existing cabinet when possible, because it limits the amount of plumbing and structural work.
Choose an IKEA bathroom vanity hack or full replacement only when the exact product instructions, wall support, countertop, plumbing, budget, and professional boundaries are clear. Before buying trim, stain, or a stone offcut, decide which tier fits the room and the lease. That first decision will keep a colorful bathroom makeover from turning into an avoidable repair.
