
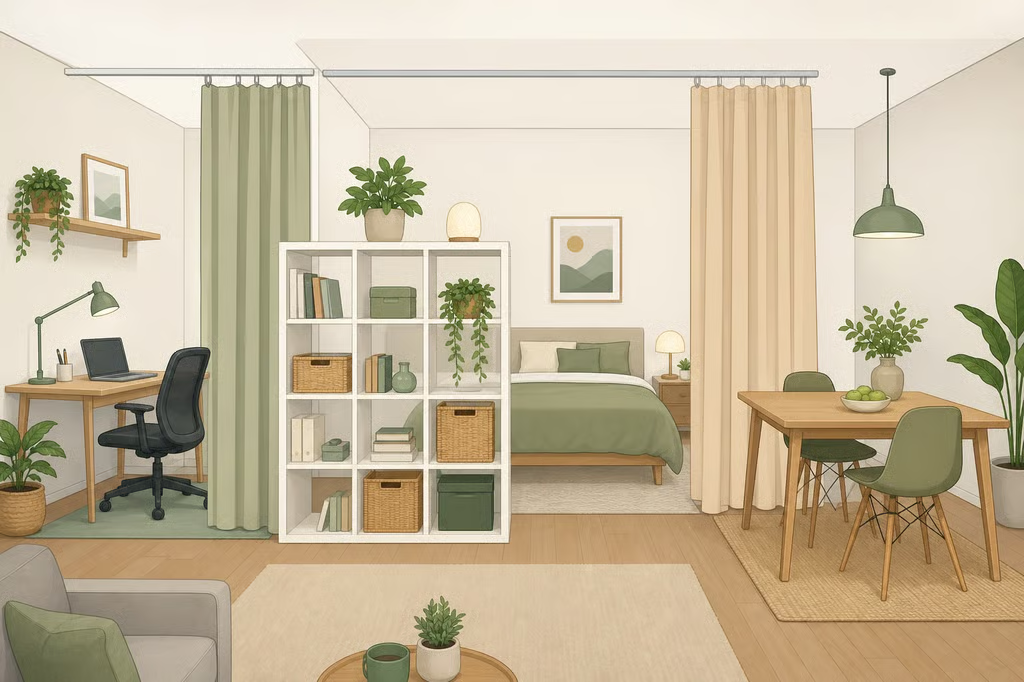
- IKEA storage room divider for studio apartment ideas
- Before you start
- Step 1: Identify the zone that needs separation
- Step 2: Measure the room and test the footprint
- Step 3: Check the lease and attachment plan
- Step 4: Compare IKEA room divider ideas before choosing one
- Step 5: Keep the finished zones workable
- Make the final choice
IKEA storage room divider for studio apartment ideas
A studio apartment has to handle sleeping, working, eating, and hosting in one open room. IKEA calls that kind of home a “24-hour room,” which is why a well-placed divider can make everyday activities feel less tangled without turning the space into a maze (IKEA).
This guide walks through how to create zones in a studio apartment, starting with the daily problem and ending with the least permanent solution that can solve it. The options include curtains, open shelving, closed wardrobes, and a custom renter-friendly faux wall. The right choice depends on how much privacy, storage, light, and flexibility the room needs.
Before you start
Gather a tape measure, painter’s tape or folded cardboard, a pencil, and a simple way to sketch the room. Have the lease available before planning any installation.
The project also needs a clear limit: a divider should define an area, not create a structural wall. Do not block a door, window used for emergency escape, heating or cooling vent, outlet, or main walking route. If the installation requires nails, screws, ceiling hardware, or anti-tip attachments, ask the landlord or property manager for written approval before buying materials.
Step 1: Identify the zone that needs separation
Start with the daily frustration, not the furniture. Is the desk too close to the dining table? Does the bed face the living area? Are clothes, office supplies, or dishes visible from every part of the room?
Write down the two areas that need a clearer boundary and what the divider must accomplish:
- Visual privacy: Hide a bed, dressing area, or workspace from the rest of the room.
- Storage: Hold clothing, books, boxes, work supplies, or display items.
- Light: Separate the zones without blocking natural brightness.
- Flexibility: Open the room for guests or change the layout later.
- A defined work area: Make a desk feel distinct from a dining or sleeping zone.
Choose the most important need before shopping. A divider that promises complete privacy, substantial storage, easy movement, and no installation may end up doing none of those jobs particularly well.
A workspace usually needs less coverage than a sleeping area. Likewise, storage may justify a larger footprint if the divider replaces a separate bookcase or wardrobe. The best solution earns its floor space.
Step 2: Measure the room and test the footprint
Sketch the room and mark the proposed divider. Include the ceiling height, wall span, columns, soffits, windows, doors, and furniture that cannot move.
Measure:
- The divider’s full length and height
- The walking route beside it
- Door and window swings
- Space needed to open drawers, cabinet doors, and wardrobes
- Nearby outlets and cord reach
- Heating and cooling vents
- Windows or doors needed for emergency escape
- The route used to bring furniture in and out
- The surface where a rod, track, shelf, or cabinet would be installed
Use painter’s tape to mark the divider’s footprint on the floor. Folded cardboard can help show its height and bulk. Walk around the outline, sit at the desk, open nearby drawers, and pretend to carry laundry or groceries through the room.
This test catches problems that a product photograph cannot. A unit may fit on paper but make the daily path feel cramped, prevent a cabinet from opening, or leave too little room to clean behind it.
If the proposed placement is close to an exit, window, vent, or building equipment, ask the landlord or property manager to confirm that the layout is acceptable before moving ahead. If the clearance is uncertain, choose a shorter, narrower, or movable option.
Step 3: Check the lease and attachment plan
Read the lease before drilling, nailing, attaching a ceiling track, or adding anti-tip hardware. Ask in writing about wall fasteners, ceiling-mounted hardware, the number of holes allowed, and the repairs expected at move-out.
A curtain may look temporary but still require a rod or track attached to a wall or ceiling. A tall shelf may need anti-tip hardware according to its instructions. A wardrobe may require a level, stable surface. “Freestanding” does not automatically mean “safe without attachment.”
Inspect the wall, floor, and ceiling where the divider will go. Note uneven flooring, trim, outlets, and any surface that could interfere with installation. Follow the instructions for the specific furniture and hardware rather than improvising a connection.
If the lease does not allow the proposed attachment, or permission is not available, choose a layout that works without it. Do not force a tall or improvised structure into a room where it cannot be secured as directed.
Step 4: Compare IKEA room divider ideas before choosing one
IKEA’s 2023 rented-studio example combines open storage and curtains to separate a sleeping area while preserving a lighter, more flexible feel (IKEA). Use the same basic comparison for the room at hand.
Choose a curtain for flexible visual privacy
A curtain is a good fit when the main goal is to hide a bed, dressing area, or clothing storage for part of the day. It can close when privacy matters and open when the room needs to feel larger.
This is usually the easiest divider to change later, but the hardware still matters. Check whether the rod or track attaches to a wall or ceiling, and account for any holes or patching at move-out. Leave enough room for the curtain to gather without covering an outlet or blocking a door.
A curtain changes the view between zones, not the sound or light level. Choose it when visual separation is enough.
Choose open shelving when storage and light matter
An open shelf can serve as a studio apartment storage divider while allowing light and sightlines to pass through. It can separate a bed or desk from the rest of the room without presenting a solid wall.
This option works well when the divider needs to hold books, boxes, clothing, or work supplies. It also puts clutter on display from at least one side, so decide what belongs on the shelves before buying the unit. Boxes and baskets can contain smaller items while leaving some open space.
As IKEA’s storage guidance from 2022 shows, a single unit with open and closed sections can serve a sleep area and work zone at the same time, giving clothes and books a place to go (IKEA). That double duty is useful in a studio, where every piece of furniture has to justify its footprint.
Assemble and secure a tall shelf according to its instructions. Do not assume that wedging it between two pieces of furniture makes it stable. Keep outlets accessible, avoid overloading the shelves, and test the finished arrangement before making it part of the daily layout.
Choose a closed wardrobe for stronger concealment
A closed wardrobe gives a room a more substantial boundary and hides clothing or belongings behind doors. IKEA’s small-space storage examples use a wardrobe in a similar tonal range as the walls to add storage without making the room feel as visually heavy (IKEA).
Choose this option when concealment matters more than an open view. Measure door or sliding-door clearance carefully, including the space needed to stand in front of the unit. A dark or especially tall wardrobe may also make the room feel more divided, so compare its finish with the existing furnishings.
If possible, let the wardrobe work from both sides of the layout. A unit that separates the bed from the desk while storing clothes or supplies is more useful than a piece that simply occupies the boundary.
Choose a custom faux wall only for a specific layout
A custom faux wall is the most involved option. It may suit a room where a curtain feels too insubstantial and standard shelving does not fit, but it requires more measuring, more attachment decisions, and more opportunities for mismatched parts.
Treat an adapted frame, panel, or desk combination as a visual divider only unless the manufacturer specifically confirms that the components are compatible. Do not use an improvised assembly as a structural wall, guardrail, climbing surface, or support for heavy objects.
Before buying materials, confirm the current product instructions, component dimensions, panel fit, base stability, and installation requirements. If any connection cannot be checked or secured as directed, stop at the design stage and choose open shelving, a wardrobe, or a curtain instead.
Step 5: Keep the finished zones workable
Once the divider is in place, live with the arrangement before adding more furniture. Sit at the desk, serve a meal, make the bed, open the storage, and walk through the room carrying a laundry basket or grocery bag.
Look for small problems that will become daily irritations:
- Cords crossing the walking route
- Drawers or doors that cannot open fully
- Outlets hidden behind furniture
- Vents covered by storage or fabric
- Too little room to clean behind the divider
- Shelves that collect visible clutter
- Curtains that block a doorway when gathered
- A structure that wobbles, flexes, or shifts
Keep the palette restrained if the room begins to look chopped up. IKEA recommends a minimal color palette for an open-plan space, balancing black and white with warm wood tones to keep the room visually calm (IKEA). Matching the divider to existing finishes can help it recede. A deliberate contrast can also work, but it should look like a choice rather than another unrelated object in the room.
Make the final choice
Use the divider that answers the main problem without creating a new one:
- Choose a curtain when visual privacy and flexibility matter most.
- Choose open shelving when storage and light matter equally.
- Choose a closed wardrobe when concealment and storage matter more than openness.
- Choose a custom faux wall only when the layout calls for it and every component can be checked, secured, and removed responsibly.
Start with the lease, the measurements, and the way the room is actually used. IKEA’s 2023 studio example shows how flexible furnishings and smart zoning can help a single room handle sleeping, working, and entertaining without pretending to become a legal one-bedroom (IKEA). A curtain or shelving unit may be all the separation needed. If the layout demands something more substantial, verify the installation before committing to a custom build.
