
Indoor treillage ideas for walls and ceilings
Indoor treillage ideas can give a plain wall, ceiling, or window a finished look without adding an opaque divider. By the end of this guide, you will know where to place the lattice, how to choose a material and mounting method, and how to decide whether greenery belongs in the plan. Start with the location, then check the wall, panel weight, hardware, light, and moisture before buying enough material for a full installation.
Treillage has a long French history. In 18th-century Europe, French designers used trellis structures as a form of “instant architecture” in gardens and castles, creating galleries, pergolas, and other scenic features, according to Decoora. The open pattern has since moved into living rooms, bedrooms, hotels, and other interior spaces, where it adds structure without closing off the room, as Good Housekeeping reported this week.
What is indoor treillage?
Treillage is an openwork structure made from intersecting slats, louvers, or other pieces. Traditionally made from wood or metal, latticework is now also available in materials such as PVC, ceramic, concrete, MDF, resins, and technical plastics. It lets light and air pass through while filtering views, so it can provide visual separation without creating a solid wall, according to Decoora.
Outdoor treillage was generally designed to support climbing foliage. Indoors, the pattern can stand on its own. Antoine Fontaine, an interior designer who incorporated treillage into the Hôtel des Peintres in Paris, calls it “a timeless classic” that can lend architectural depth to a space that lacks it, Good Housekeeping reported this week.
Meg Lonergan of Meg Lonergan Interiors describes indoor treillage as a way to bring character, rhythm, and craftsmanship into a room, also via Good Housekeeping. That makes it useful on broad, flat surfaces where paint or wallpaper alone feels a little unfinished.
Fontaine also notes that treillage is often left bare because the eye can follow its regular pattern. That is worth remembering before installation: an indoor trellis is decor first. Plants are an optional second decision with their own requirements for light, water, drainage, and wall protection.
Choose your indoor trellis wall decor placement
Choose the placement before choosing the material. A full wall has a different visual and practical effect from a painted motif, framed panel, or freestanding screen.
Start with an accent wall
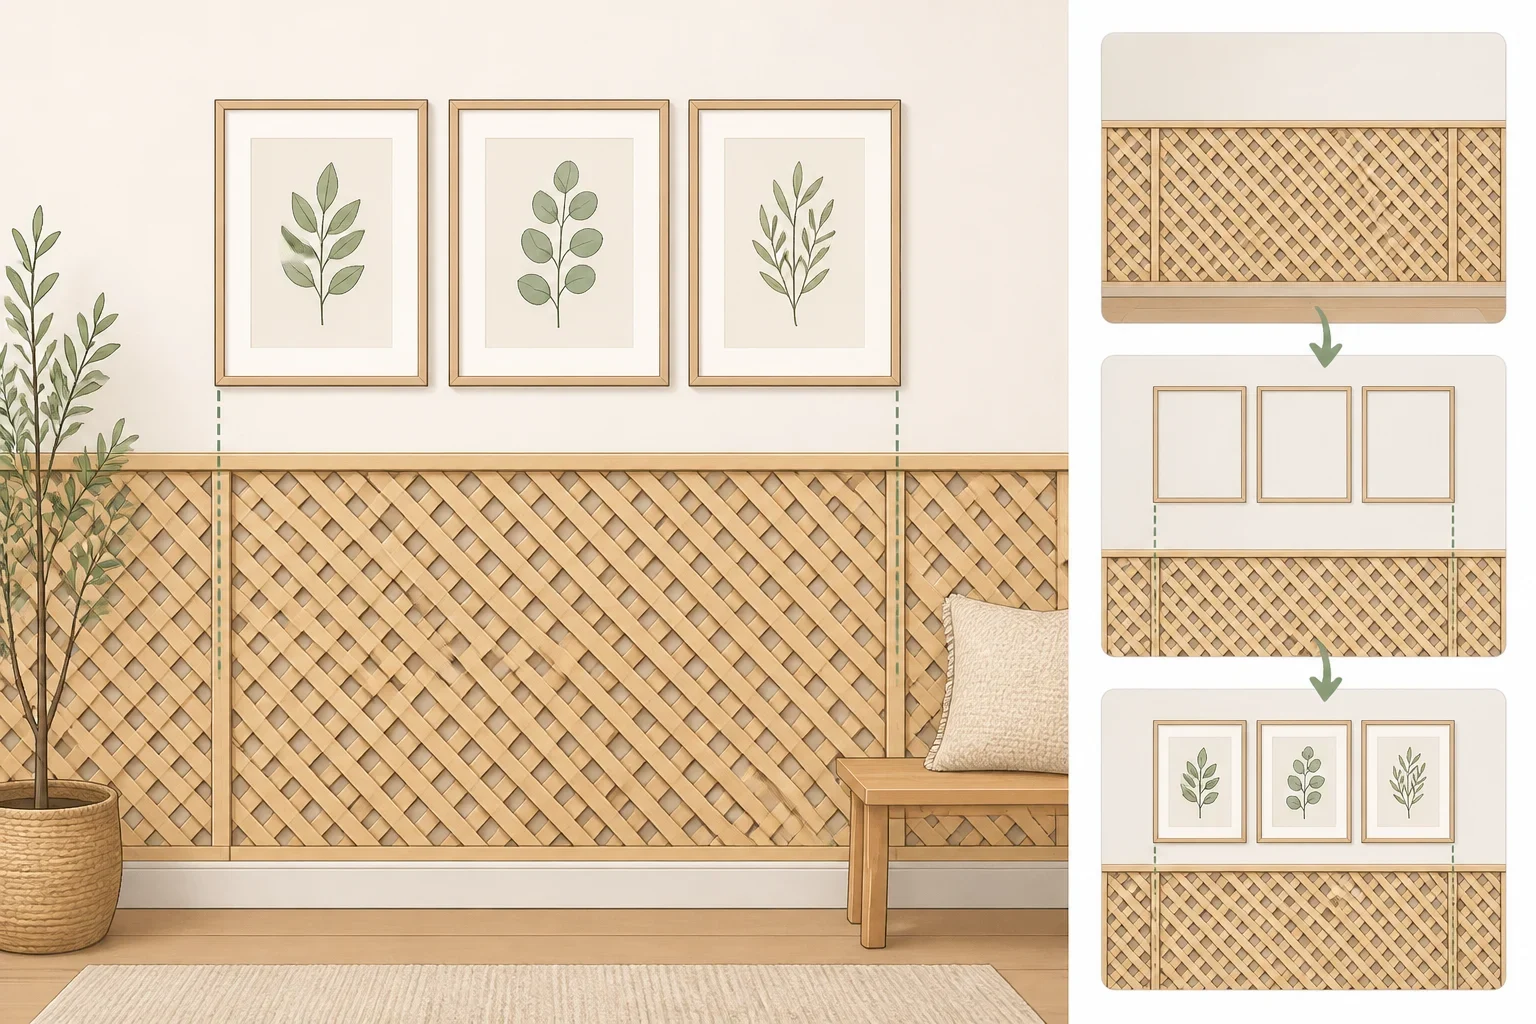
An accent wall is the strongest wall-based statement and suits a room that needs a defined focal point. A dining room wall, living room backdrop, bedroom headboard wall, or entryway can all support the look. Keep the rest of the room in mind, though. Treillage already supplies a repeating pattern, so adding several competing prints can make the wall feel busy.
Framed art can be layered over the lattice for a polished, dimensional effect, according to Good Housekeeping. Plan the art and its hardware before drilling. A picture should attach to the wall or a properly rated mounting system, not depend on a decorative panel that was never designed to carry its weight.
Material matters here, not just color. Wood, metal, PVC, ceramic, and concrete create different maintenance and durability demands, Decoora explains. Heavy materials also change the installation from a straightforward decorating project into a structural one.
Try the ceiling carefully
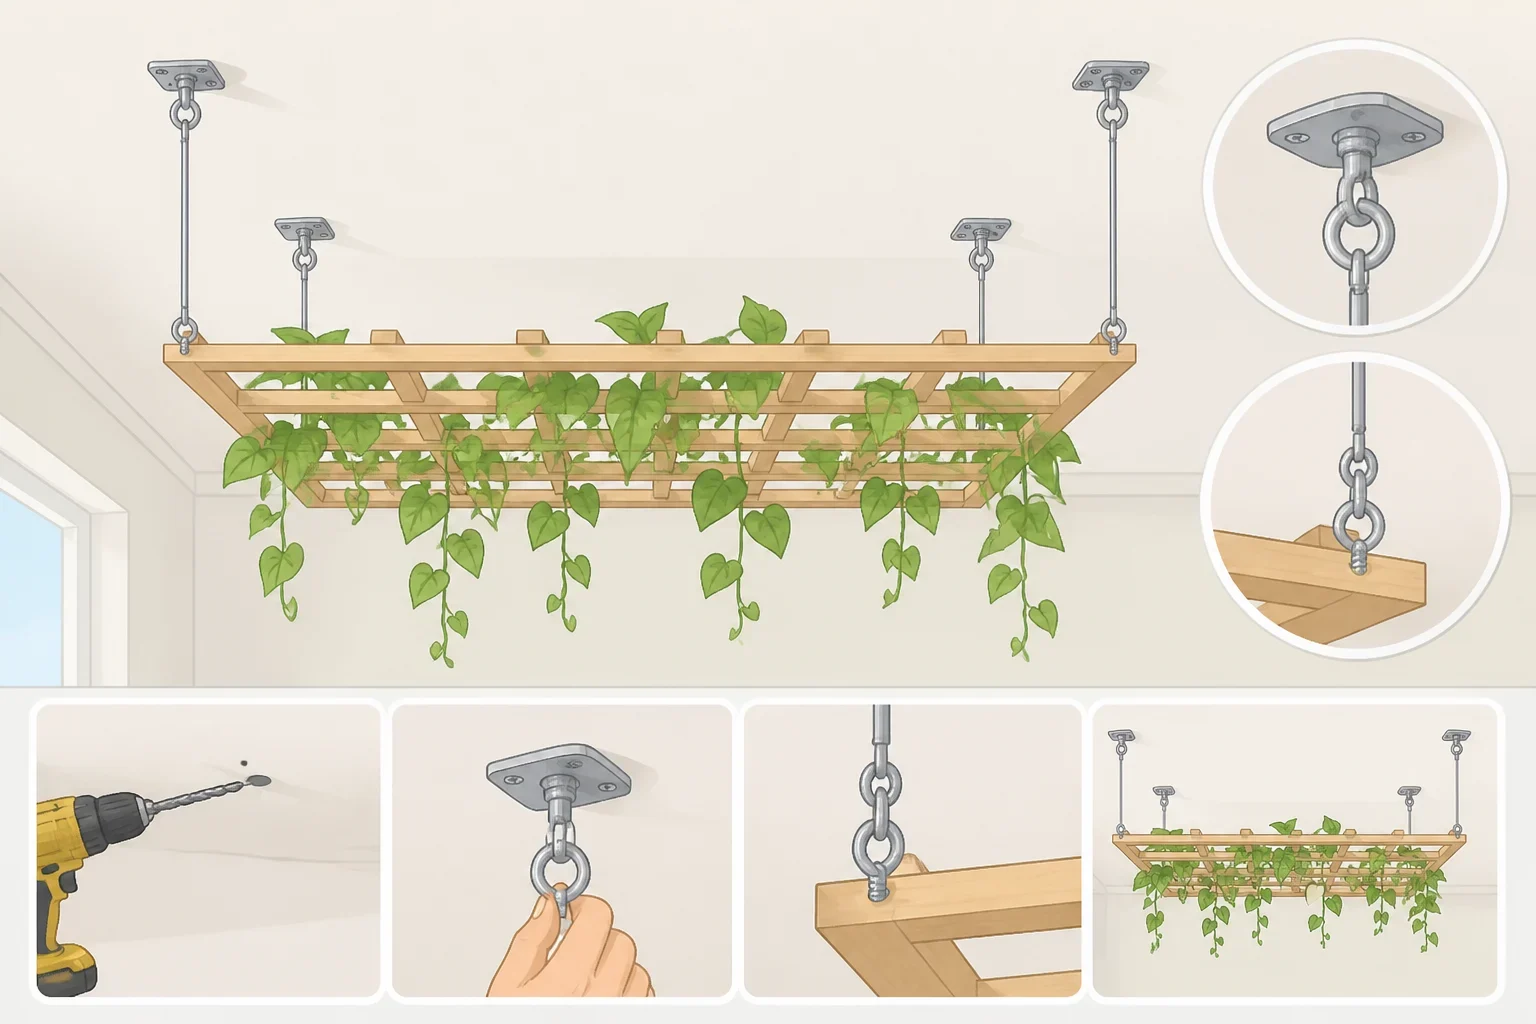
The ceiling, or “fifth wall,” can work especially well in a long room. Lonergan says treillage on a ceiling creates a tailored, layered effect on an otherwise flat surface without overwhelming the space, as Good Housekeeping reported.
Treat an overhead installation as a higher-risk project. Use hardware approved for the specific panel and ceiling substrate. If the material is heavy, the ceiling is difficult to access, or the project requires more than basic fastening, use a qualified installer. A decorative ceiling should not be held up by guesswork.
Use a window screen for light and privacy
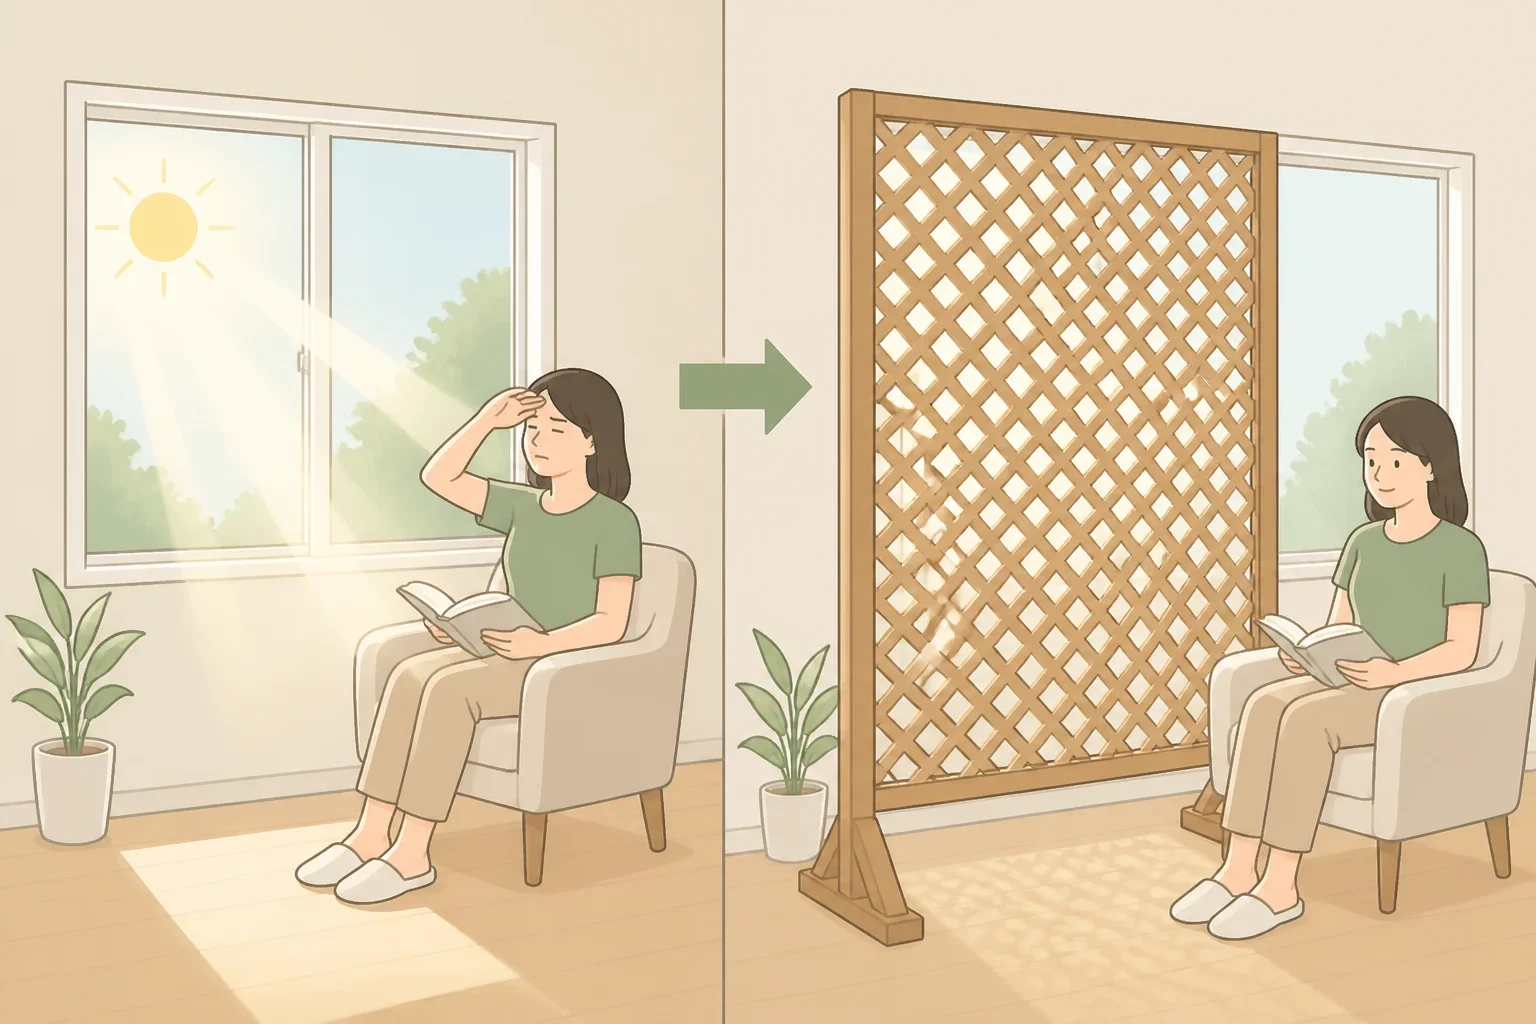
A lattice screen near a window can filter light, reduce glare, and preserve brightness while casting patterns onto nearby walls and floors, according to Decoora. This is a good choice when softer light is the goal but a permanent wall treatment feels like too much.
Check the trade-off first. A screen may reduce the view, and a freestanding piece needs a stable base. Secure an anchored screen according to the product instructions, and keep it clear of places where it could be bumped or tipped.
Test the pattern in a small format
Renters and cautious decorators can try the geometry on a framed panel, patterned textile, wallpaper, painted motif, flowerpot, lamp, or small light screen. Decoora lists smaller objects and surfaces as ways to introduce the motif without committing to large panels.
Live with the sample through different lighting conditions before ordering enough material for a wall or ceiling. A small test can also reveal whether the pattern works with existing furniture, artwork, and window treatments.
Install a decorative lattice wall indoors
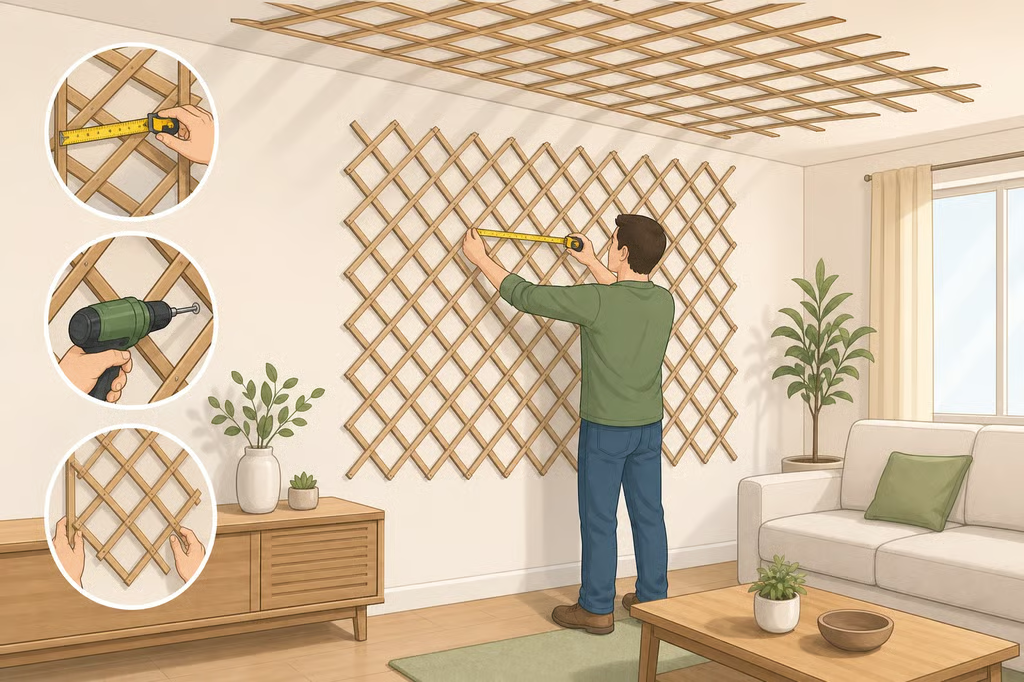
Gather a tape measure, level, drill and bits suited to the wall, and mounting hardware approved for the panel. Keep the product instructions nearby. There is no universal anchor size or fastening method for every lattice product, wall type, and panel weight.
1. Inspect the wall and choose the material
Check the wall for dampness, damage, loose plaster, and anything that could prevent a firm attachment. Installing wood over a damp substrate can cause the veneer to separate from its MDF or plywood core, according to BuildMat Insight.
Match the material to the project and the installer’s skill level. Lightweight PVC or wood lattice may work with basic mechanical anchors or a clip system when the product instructions allow it. Metal, ceramic, concrete, and other heavy structures deserve professional review before installation, Decoora advises.
2. Acclimate wood panels
Bring wood panels into the installation room for 48 to 72 hours before unboxing and hanging them, following BuildMat Insight. Keep the room stable during that period and confirm that the HVAC system is operating.
Wood responds to changes in moisture. The cited installation guidance warns that skipping acclimation can contribute to bowing or cupping, and says panels that have already cupped may need to be removed and replaced. Waiting is cheaper than trying to rescue a warped panel after it is on the wall.
3. Measure and mark the layout
Measure the finished wall rather than relying on rough drywall edges. Mark panel boundaries, seams, outlets, corners, and trim that will interrupt the pattern. Use a level to establish a true vertical or horizontal line before drilling.
Dry-fit the pieces if possible, especially around outlets and corners. Check the final cut at each edge before fastening. A crooked first panel can make every following panel look wrong, and a narrow sliver at the end of a wall is difficult to disguise.
4. Match the drill bit and anchor to the wall
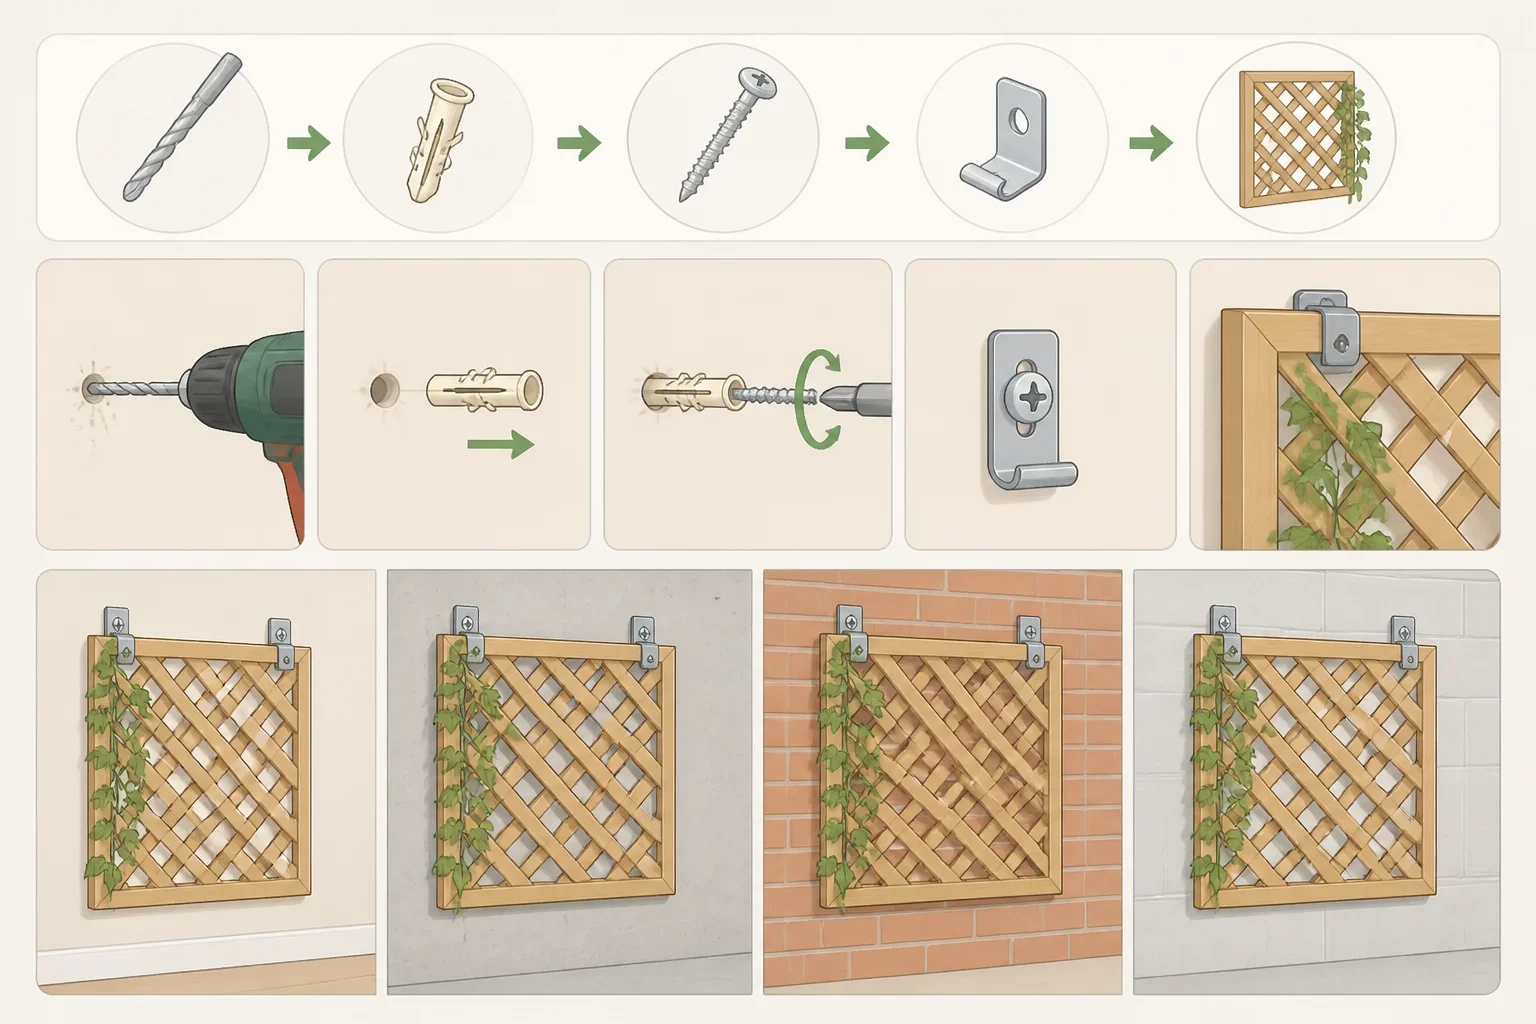
Use a drill bit designed for the substrate, whether that is wood, plaster, brick, concrete, or another surface. Insert the wall plugs or anchors specified for the product and substrate, then attach the panel while checking for tension, gaps, or deformation. Decoora supports this general sequence of drilling, anchoring, positioning, and checking.
Do not improvise with ceiling hardware or rely on adhesive simply because a panel feels light in hand. Adhesive compatibility varies, and the manufacturer may require mechanical fasteners. If the wall is damaged or the panel is heavy, stop and bring in a professional.
5. Finish the edges
Once the panels are secure, seal joints if the product calls for it, sand edges that could snag, and apply an appropriate paint, stain, varnish, or protective finish. Decoora recommends finishing the piece for a cleaner appearance and longer service life.
Follow the finish manufacturer’s directions for ventilation and drying time. Do not coat over clips, moving parts, or any component if the finish could interfere with the mounting system.
Style treillage with color, light, or greenery
White is the expected choice, but it is not the only one. Fontaine used celadon green to complement the color of a large veranda, according to Good Housekeeping. A painted panel can blend into the wall or make the pattern a clear focal point. Test the color on a sample first, since openings and shadows can make a bright shade feel stronger than it did on a flat paint chip.
Light can emphasize the geometry. Near a window, the openings allow light to pass through and create shifting patterns on adjacent surfaces. LED strips or spotlights behind a perforated panel can also turn the lattice into a luminous screen, Decoora reports. Permanent electrical work belongs with a qualified professional.
Decide whether greenery fits the room
Traditional treillage was meant to be covered with climbing foliage, but an indoor panel does not need a living plant system. Bare, painted, art-layered, or textile-based treillage is the lower-maintenance choice.
Preserved moss can provide a green finish without watering or plant growth. It is real plant material treated to retain its color and texture, while living walls use real plants in a growing system, according to D and G Flooring. The two should not be treated as interchangeable.
Preserved moss tolerates indirect light, while direct sun can fade its color. The source places its preferred humidity between 30% and 70% and warns that levels above 80% can create mildew risk, D and G Flooring reports. Keep it away from persistent steam, cooking residue, and direct heat. Because the material should not be watered, dust it gently rather than wiping it with a damp cloth.
A living wall needs a larger plan. Guidance from D and G Flooring recommends 1,500 to 3,500 lux at the plant surface for at least 12 hours a day, while many homes provide only 200 to 500 lux from window light. Dedicated grow lights are therefore generally required. Living installations also need watering, drainage, wall protection, and regular care.
If the room cannot support the light, humidity, water management, and maintenance, stop at the lattice or preserved greenery. That is not a compromise. It is the version most likely to keep looking good.
Make the next decision simple
Start with a small panel, textile, wallpaper sample, or painted motif. If the pattern earns a larger role, inspect the wall, confirm the panel material and finished weight, read the mounting instructions, and choose a placement that suits the room’s light and moisture conditions.
An accent wall is the simplest permanent statement. A ceiling needs extra care because it is overhead. A window screen offers filtered light and privacy, while a small decorative version lets renters and first-time DIYers test the look without creating a major repair job.
Treat treillage and greenery as separate choices. Verify the wall and hardware before installation, use a professional for heavy or overhead work, and choose a living wall only when the space can provide proper light, water, drainage, wall protection, and ongoing maintenance.
