
- Bathroom Waterproofing Mistakes to Avoid Before Tile Goes Up
- Why waterproofing deserves the first check
- Common bathroom remodel mistakes at the hidden details
- Why this bathroom renovation mistake gets expensive
- Bathroom renovation mistakes to avoid before the walls close
- Other planning checks worth making
- Before final payment
Bathroom Waterproofing Mistakes to Avoid Before Tile Goes Up
A bathroom can look finished while trouble is still collecting behind the tile. Among the bathroom renovation mistakes to avoid, contractor sources repeatedly flag hidden waterproofing failures because the damage may stay out of sight until repairs become destructive.
Tile and grout are the wear surface, not the waterproofing system. A membrane behind or beneath the tile catches water that passes through joints and transitions, then guides it toward the drain when the system is designed to do so. If that layer is missing, interrupted, or poorly connected to the pan and drain, the finished shower can conceal a serious problem.
That is the checkpoint to handle before the contractor closes the walls or sets tile. The warning comes from remodeling businesses, not a formal industry survey, so it should be read as a repeated contractor observation rather than an objective ranking of every renovation regret.
Why waterproofing deserves the first check
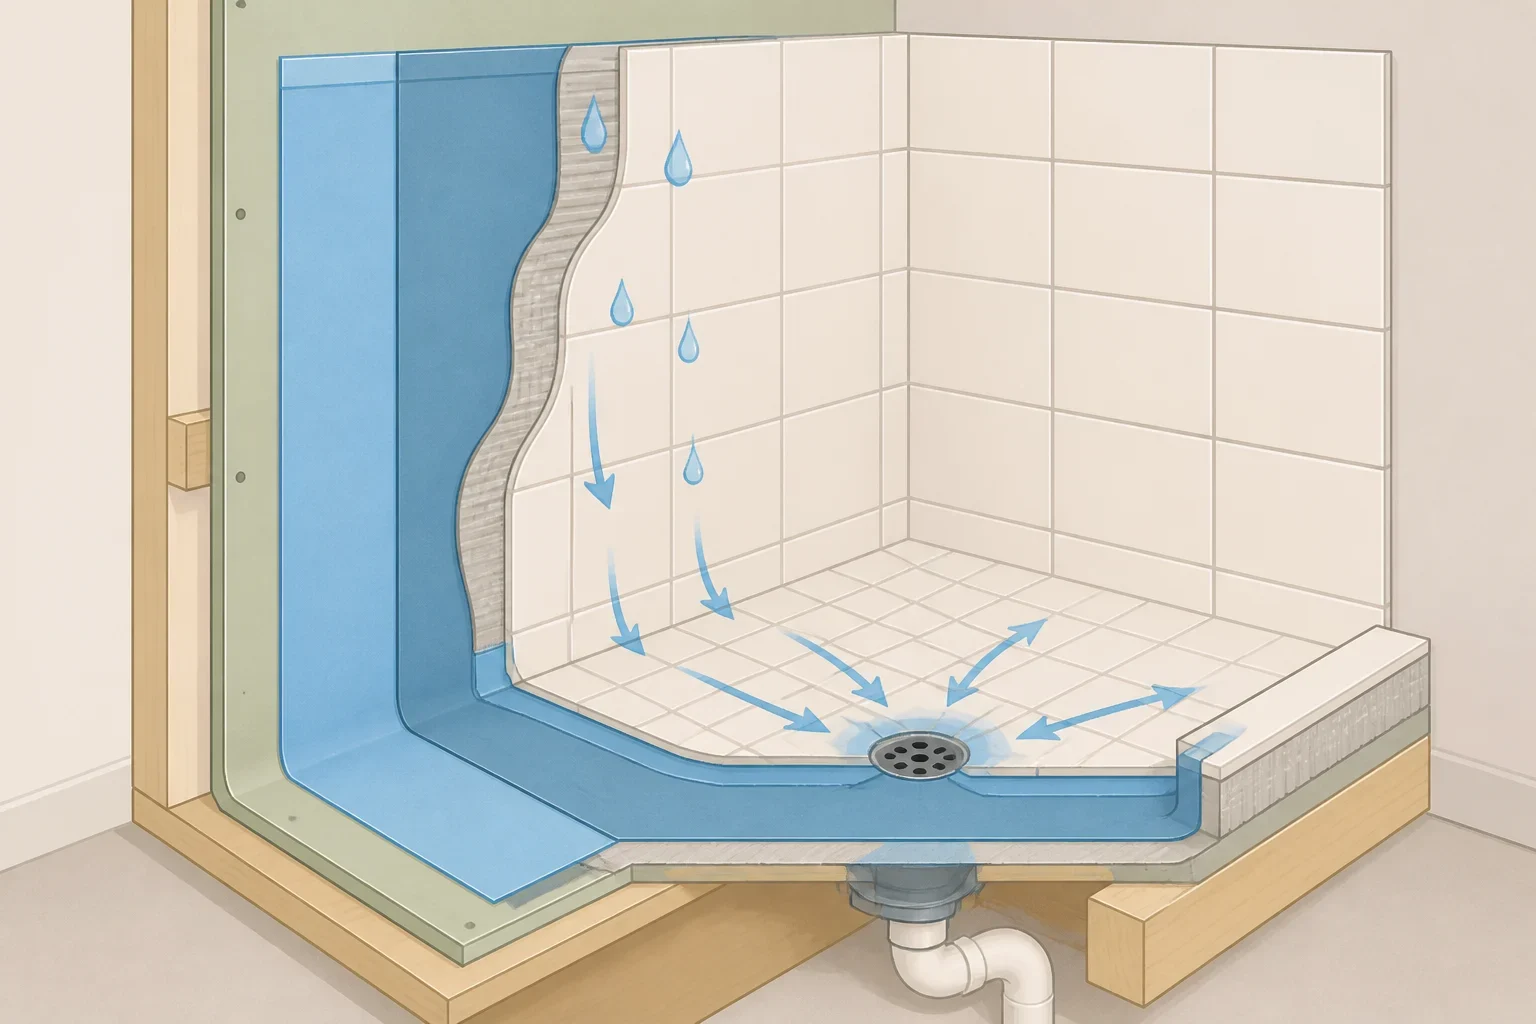
The biggest bathroom regrets are not always taste mistakes. A tile color can disappoint, and a vanity can make the room feel cramped, but those problems are visible. A leak inside a wall cavity is harder to find and much harder to correct neatly.
In its August guidance, Capital Construction distinguishes the tile and grout from the waterproofing system beneath them. Boise Bath, a bathroom remodeling business, made the same point in a guide updated in June: Tile may resist water, but grout is porous, and joints, corners, and changes of plane can move over time. Water can pass through the tiled surface, so the assembly needs a continuous barrier underneath.
Think of the tile as the roof covering and the membrane as the layer that protects the structure below. The analogy is not perfect, but it captures the important division of labor. The finish takes the daily wear; the hidden system manages the water that gets past it.
The membrane must remain continuous at inside corners, pipe penetrations, niches, curbs, and other transitions. A wet-area wall also needs a compatible backer material. Capital Construction says greenboard, or paper-faced gypsum board, is not an acceptable direct-wet-area substrate and points to cement board or another approved backer under the waterproofing layer. Shugarman’s Bath, a tub and shower remodeling company, also reports that paper-faced gypsum products were removed from the approved list for direct wet areas in 2006. Ask which backer is being used and where the waterproofing layer sits in relation to it.
Common bathroom remodel mistakes at the hidden details
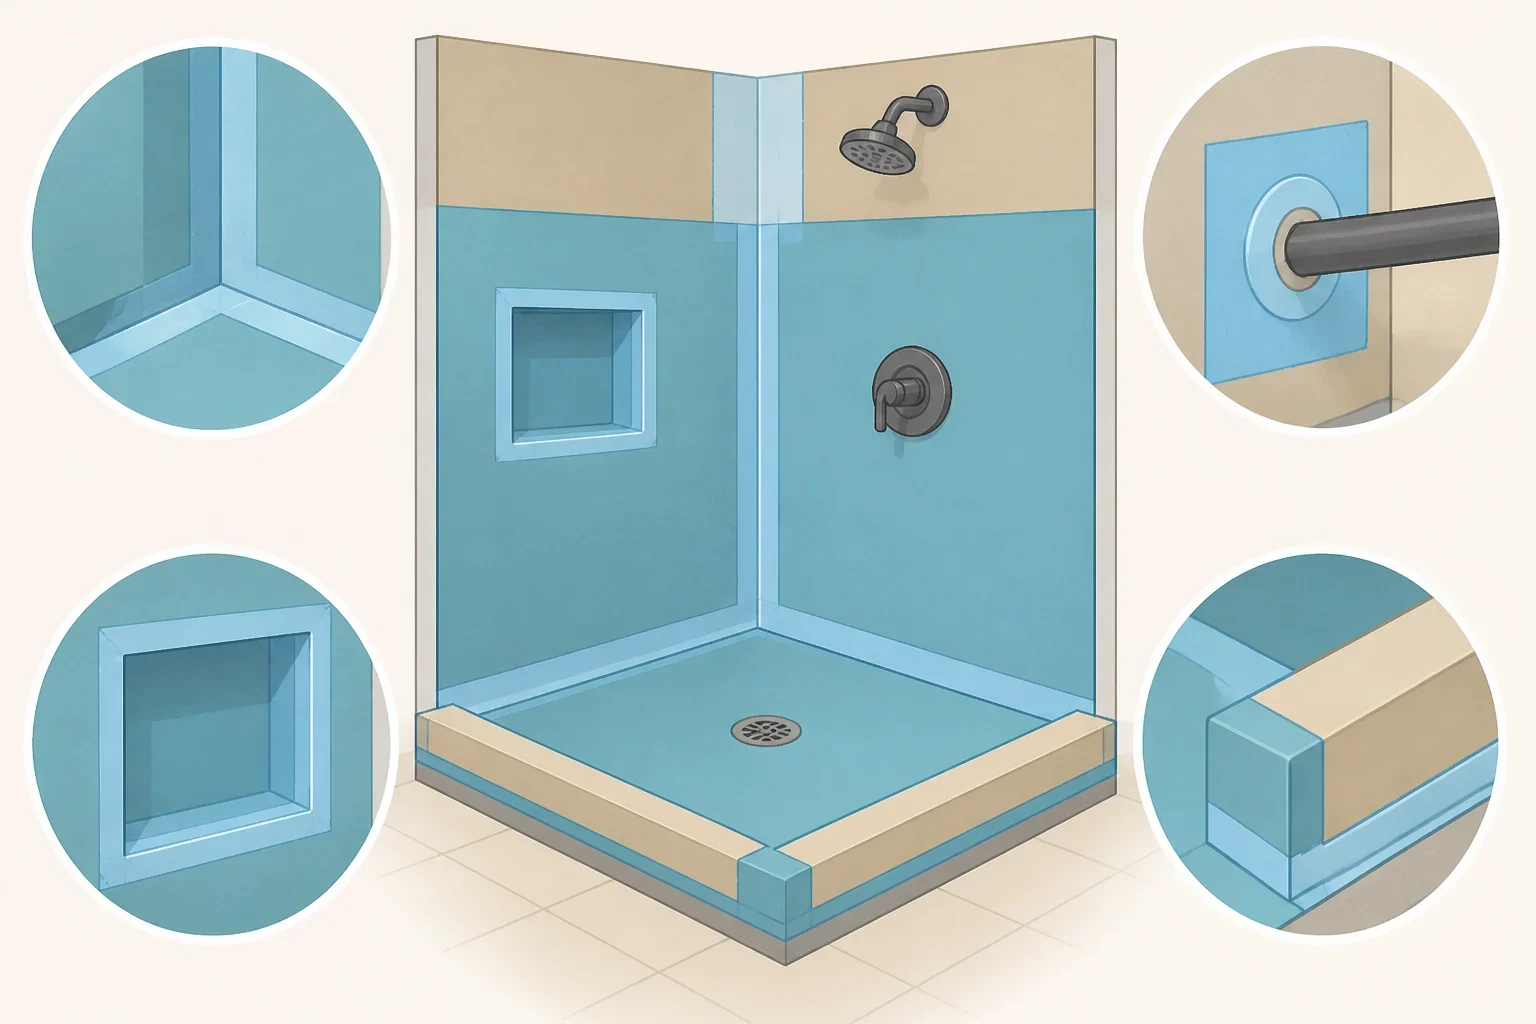
“Make sure it is waterproofed” is not enough of a project specification. Before the work disappears behind tile, ask how the installer is handling each interruption in the system.
- Corners and seams: Inside and outside corners need the banding, sealant, or overlap specified for the chosen system. Shugarman’s Bath reported in March that problems often appear where two shower walls meet. Boise Bath also identifies untreated corners, seams, and curbs as recurring leak points.
- Pipe, valve, and niche penetrations: Every opening through the membrane needs the compatible collar, banding, or sealant called for by that system. Boise Bath identifies these penetrations as potential leak locations. Ask what component will be used at each one, rather than accepting a general promise to “seal everything.”
- Niches and curbs: A recessed niche creates another opening in the wall assembly. The curb must be fully wrapped rather than left as bare mortar, according to Boise Bath. A curbless entry needs particularly careful treatment at the threshold because water can move toward the bathroom floor.
- The pan and slope: Boise Bath warns that a pan without a pre-slope beneath the liner can hold water in the assembly, contributing to deterioration and mold growth. The finished floor should slope evenly toward the drain, with about 1/4 inch per foot cited as a common target by the source. The correct assembly still depends on the waterproofing system and local requirements.
- The drain and weep holes: The drain needs to match the waterproofing method. Boise Bath distinguishes a clamping-ring, three-piece drain for traditional liner pans from a bonded-flange drain for sheet-membrane systems. Ask how the membrane connects to the drain and how the weep holes will remain open.
These systems are not interchangeable. Liquid-applied membranes, sheet membranes, and traditional liner systems have different installation steps and compatible parts. Request the product or system name and its installation instructions. The homeowner does not need to become the tile setter, but does need to know what was specified, what must happen before tile, and who is responsible for checking it.
Why this bathroom renovation mistake gets expensive
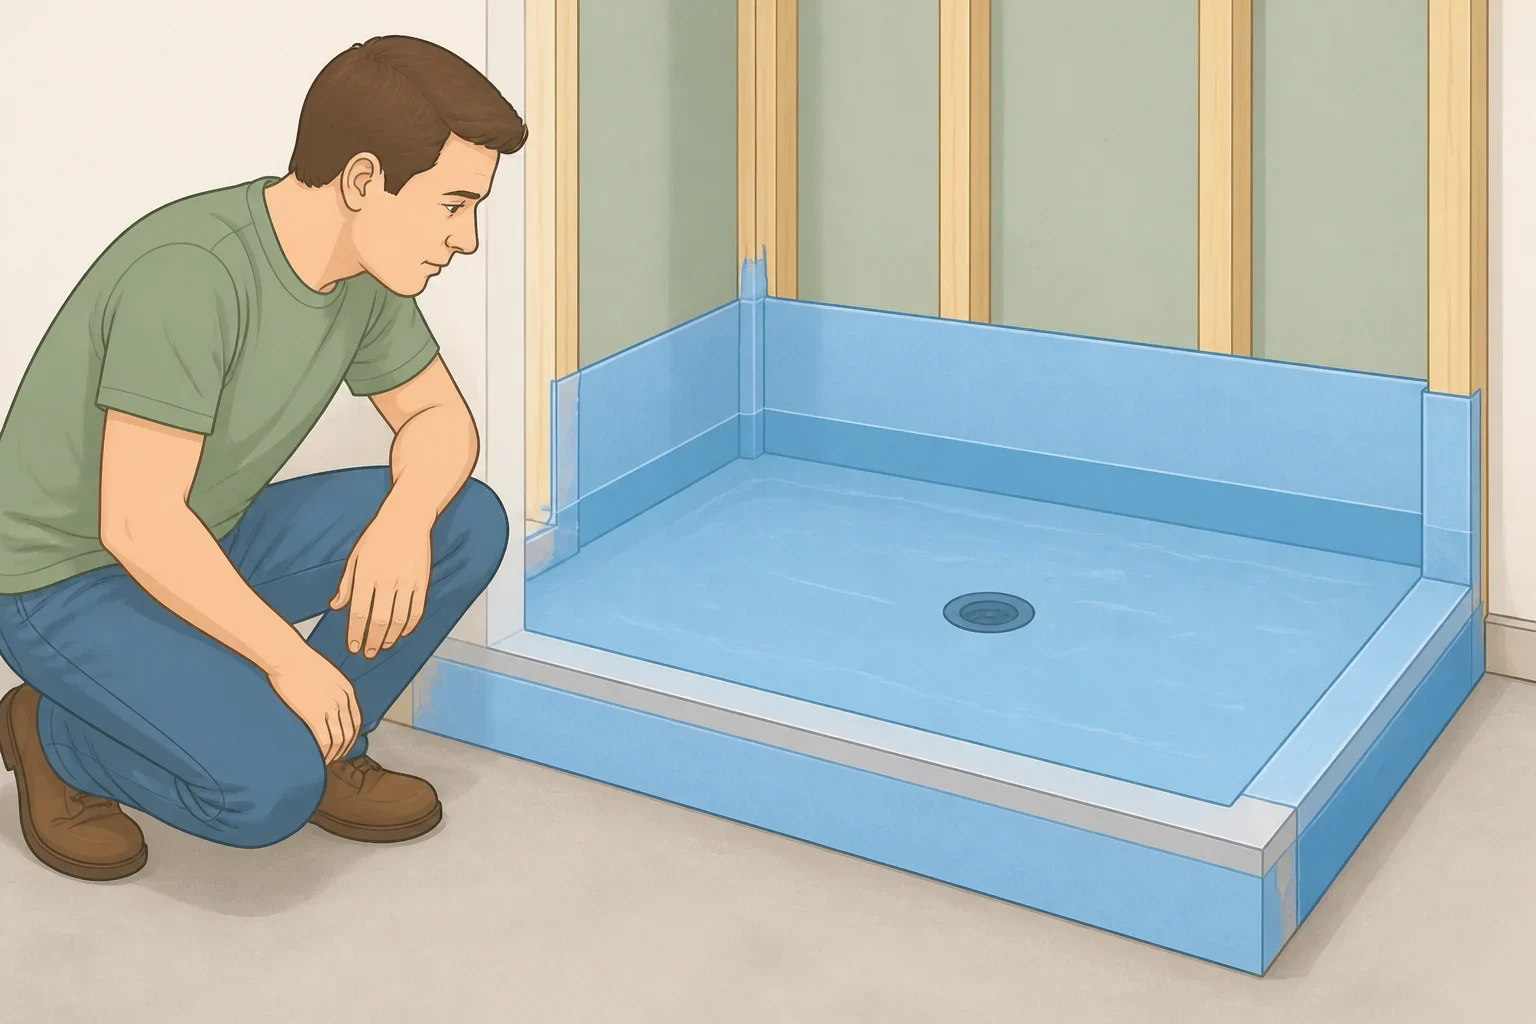
Waterproofing failures may not announce themselves during the renovation. Boise Bath says water can move into wall cavities, subfloors, and framing quietly for months or years before visible damage appears. Capital Construction describes a slow wall leak eventually showing up as water damage on the ceiling below.
Once tile is installed, discovery can become destructive. Capital Construction describes a failed shower pan as a demolition problem rather than a simple patch. That source does not establish one repair sequence for every bathroom, so the practical question is whether the problem can be corrected without opening finished work. Often, that answer is no.
SFKB, a Palm Beach County remodeling firm, reported in May that skipped waterproofing can lead to substrate rot within two to three years and a complete shower tear-out. That is the firm’s warning, not a universal timeline. The company also lists skipped waterproofing among mistakes that can be addressed during planning but are difficult to correct after installation.
For an existing bathroom, certain signs deserve investigation before anyone reaches for new grout:
- A musty or mildew odor that returns after cleaning
- White, chalky efflorescence at grout lines or the base of the wall
- Loose, cracked, or hollow-sounding tile
- A soft or spongy floor near the shower threshold
- A ceiling stain below a second-floor bathroom
Boise Bath identifies these as possible signs of trapped moisture or deterioration. None proves a waterproofing failure on its own, but each is a reason to pause cosmetic work and investigate the assembly.
Bathroom renovation mistakes to avoid before the walls close
The homeowner’s most useful role is verification. Photos and written answers cannot replace a qualified installer’s work, but they create a record before the important details disappear.
Before approving wall closure or tile installation, ask:
- Which system is being used? Identify whether the shower has a sheet membrane, liquid membrane, traditional liner, or another system. Get the product name and installation instructions.
- What is behind the waterproofing? Confirm the wet-area backer and where the membrane will sit in relation to it.
- How are transitions handled? Have the installer explain the treatment of corners, seams, niches, valves, pipe penetrations, curbs, and the threshold.
- How do the pan and drain work together? Ask how the pan slopes toward the drain, how the liner or membrane connects to it, and how the weep holes will be protected.
- When will testing happen? Boise Bath describes a flood test in which the drain is plugged, the pan is filled to the curb, and the water sits, often for 24 hours, before tile is installed. Ask who will perform the test, when it will happen, and how the result will be documented. The system and local requirements control the exact procedure.
- When can tile go up? Liquid membranes and other products have manufacturer-specified cure and wait times. Boise Bath warns that tiling over an uncured membrane can compromise the bond. Schedule pressure is not a reason to skip those instructions.
- Can the work be photographed? Request clear photos of the waterproofing, plumbing, blocking, corners, niche, curb, and drain connection before they are covered. Capital Construction specifically recommends photographing waterproofing, plumbing, and blocking before wall closure.
During contractor consultations, ask directly what steps the installers take to waterproof the shower. Shugarman’s Bath recommends raising that question before work begins. A useful answer should identify the system, transition details, testing responsibilities, and documentation, not simply say that cement board will be installed.
Permits and contract rules vary by state and project. Verify the contractor through the relevant licensing board and check local requirements rather than relying on a license number printed in an advertisement. For California projects, the California Contractors State License Board says the rules include a written contract for home-improvement work over $500, written change orders signed before changed work begins, and a standard down-payment cap of $1,000 or 10%, whichever is less. Those figures are a California example, not nationwide requirements.
Other planning checks worth making
Waterproofing remains the main hidden risk, but ventilation affects how the bathroom manages moisture after the remodel is complete. Capital Construction identifies three recurring problems: no exhaust fan, an undersized or poorly controlled fan, and a fan ducted into the attic instead of outdoors. Ask where the exhaust discharges and how the fan will be controlled. A humidity-sensing control is one option identified by the source.
Plan the shower niche during framing and waterproofing, not on tile day. SFKB gives an example range of 12 to 14 inches wide, 18 to 24 inches tall, and 4 inches deep, but those dimensions are not universal. Size the niche around the available framing, the waterproofing system, the products used in the shower, and the reach of the people using it.
Storage should be measured in the room rather than guessed from a catalog. Capital Construction’s warning is useful here: storage planned after the vanity is installed is storage the household does not get. Check the vanity footprint, door and drawer clearance, and the movement of the sink, toilet, shower panel, and bathroom door before ordering.
Budgeting also deserves a reality check. SFKB estimates tile material and installation at 20% to 30% of a typical mid-range remodel budget, but that is the firm’s planning estimate, not a universal price. Treat it as context, then get a project-specific quote.
Before final payment
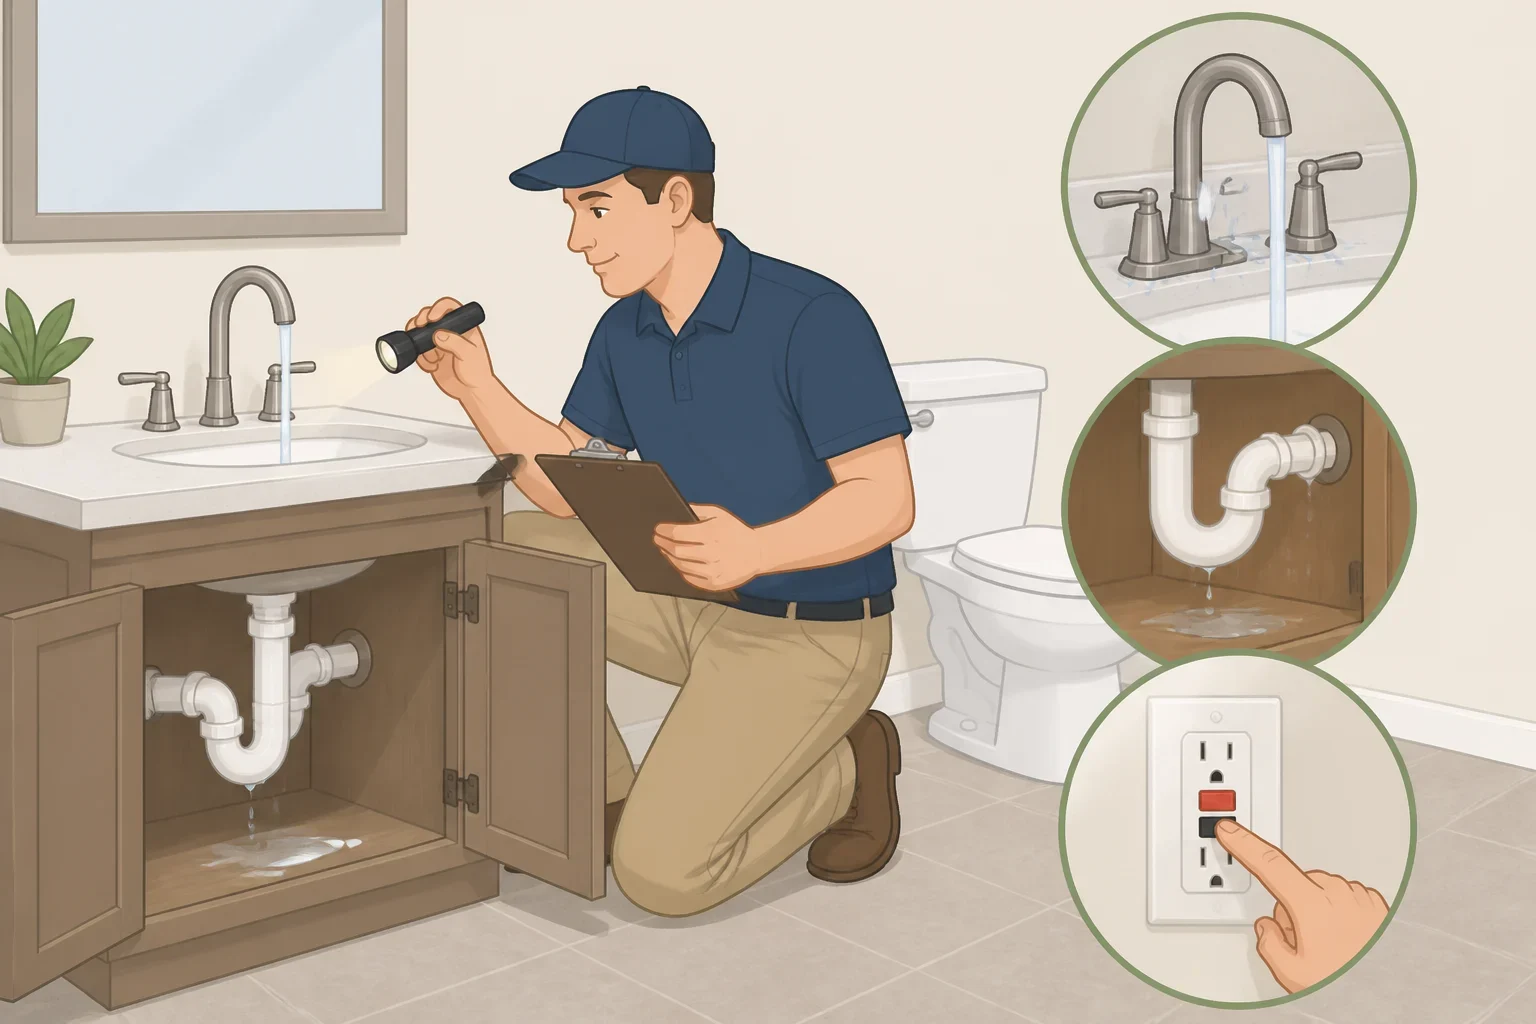
A final walkthrough should test the room, not just admire it. Capital Construction recommends running every faucet, the shower, and the toilet; watching the drains; and checking underneath fixtures for leaks. Test each GFCI receptacle, confirm the exhaust fan runs and discharges outdoors, and open every door, drawer, and shower panel through its full travel.
Test the lighting controls and dimmers. Inspect grout lines, sealant, transitions, and exposed edges. Collect permit sign-offs, warranties, care instructions, and spare tile, then put every unresolved item in writing before closeout.
The pause point comes earlier, before the walls close: do not approve tile installation while the waterproofing system, backer, penetrations, pan, drain connection, cure times, and required testing remain vague. If the answers are unclear, pause the schedule and get clarification. That small delay is easier to manage than discovering a hidden water problem after the bathroom is finished.
