
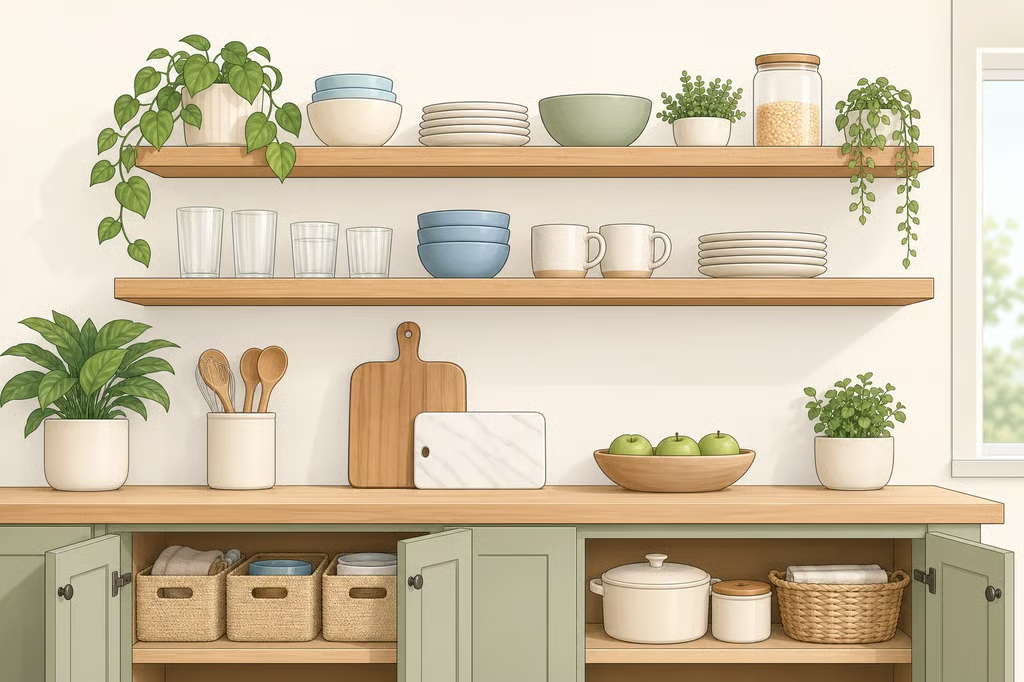
- Small kitchen open shelving ideas that stay practical
- 1. Decide whether open shelving suits the kitchen
- 2. Audit closed storage before giving away wall space
- 3. Choose the wall or zone that earns a visible shelf
- 4. Plan height, depth, and reach
- 5. Verify the wall and bracket system
- 6. Style open kitchen shelves around real maintenance
- 7. Make the final install-or-skip decision
Small kitchen open shelving ideas that stay practical
Open shelves can make a cramped kitchen feel lighter, but they can also turn everyday dishes into a permanent cleaning project. The best small kitchen open shelving ideas start with a simple decision: put visible shelves where they improve the room, then keep items you use most, or items you would rather not display, behind doors and in drawers.
This guide walks through the decisions in order. You’ll learn how to choose a wall, audit hidden storage, assess reach and wall construction, plan for grease near a range, and style shelves without creating another chore. The goal is not to remove every upper cabinet. It is to add open storage only where the household can use and maintain it comfortably.
Before starting, gather a tape measure, a stud finder, the shelf and bracket instructions, and a clear list of what the shelves need to hold. If the project involves a library ladder, a rail, electrical work, plumbing, or a wall with unknown construction, treat it as a renovation decision rather than a quick weekend installation.
1. Decide whether open shelving suits the kitchen
Start with the way the kitchen is used, not the inspiration photo. Open shelves work best when the items on them are attractive, easy to reach, and simple to return to the same place. They are less forgiving when the shelf becomes the landing spot for unopened mail, mismatched food containers, small appliances, and dishes waiting to be washed.
The design appeal is real. A Family Handyman project published in 2022 describes open shelving as a popular look because it can make a kitchen feel bigger and more open. That is a design rationale, not a guarantee that shelves will make every kitchen feel larger. (Family Handyman)
The upkeep deserves equal attention. In coverage published in October 2024, Livingetc reports that interior designer Nina Lichtenstein considers open shelves attractive in photographs but difficult in daily life because everything remains visible and exposed. The coverage also notes that dishes can collect grease and dust. If wiping the shelf and its contents feels manageable, proceed. If not, use a smaller installation or consider glass-front cabinets instead. (Livingetc)
A single shelf may be enough. Livingetc’s global brand director Sarah Spiteri uses one open shelf for decorative objects while keeping practical storage in low-level cabinetry. That approach suits busy households and anyone who likes an airy look without putting every plate on display.
2. Audit closed storage before giving away wall space
Do not install shelves simply because upper cabinets feel visually heavy. First, list what the kitchen must store:
- Everyday plates, bowls, glasses, and mugs
- Pots, pans, baking equipment, and serving pieces
- Food, spices, and cooking oils
- Cleaning supplies, brushes, and brooms
- Knives and sharp tools
- Small appliances and less attractive packaging
Mark each item as “display,” “easy reach,” or “behind a door.” Do not force the last category onto an open shelf just because cabinet space is tight. A shelf can expose a storage problem without solving it.
A Houzz case study of a 150-square-foot Atlanta kitchen shows why this audit matters. The kitchen had limited counter and cabinet space, so designer Meka Jones added several forms of concealed storage before relying on open shelving. The renovation reclaimed 21 inches of depth from an adjacent bedroom closet, added a pull-out blind-corner insert, built a slim touch-release broom cabinet into the refrigerator surround, and installed narrow pull-outs for spices and utensils. (Houzz)
Inspect nearby space before filling the wall. Look at an awkward corner, the side of a refrigerator surround, the back of a cabinet, or an adjacent closet. Changes involving plumbing, HVAC, or wall construction may require a designer or contractor. Renters should stick to reversible organizers and should not cut into walls without permission.
Review the largest storage choices, too. A tall pantry, a pull-out corner insert, or a narrower appliance may preserve more useful storage than replacing an entire run of upper cabinets with shelves. Open shelving should fill a deliberate gap, not create a new one.
3. Choose the wall or zone that earns a visible shelf
Once hidden storage is mapped, choose the shelf location by function. Look for a wall that needs a visual lift but does not carry the kitchen’s hardest-working storage load.
A shelf can work well:
- Beside a range, if the items are easy to clean and the installation is appropriate for the cooking area
- Across a window, if it does not block needed light, operation, or access
- On a short feature wall where a full cabinet would feel bulky
- Near the dining area for attractive glassware or serving pieces
- Along a wall with a clear return path, so people are not brushing against it while cooking
Be careful beside a range. Grease is part of normal kitchen use, and exposed dishes can collect it along with dust. Livingetc’s October 2024 coverage raises this concern directly. Keep the shelf for pieces that can be washed easily, avoid fragile or rarely cleaned objects in the splash zone, and decide how the surface will be wiped before placing half the kitchen there. (Livingetc)
The Atlanta example used open oak shelves beside the range to maintain symmetry with the counter on the opposite side. The shelves were not the room’s main storage system. They filled a specific design gap while drawers and pull-outs handled more practical work, a useful model for a small kitchen makeover with open shelves.
Before drilling, use painter’s tape to mark the shelf length and position. Walk through the room with cabinet doors open, the oven door down, and the refrigerator door open. Check the route from the sink to the range, and make sure the shelf will not interfere with lighting, windows, doors, or normal movement. If a ladder is part of the plan, mark its travel path, too.
4. Plan height, depth, and reach
A shelf is not useful storage if the household avoids reaching it. In the Atlanta kitchen, the homeowners previously needed a stepladder to retrieve items stored high up. The redesign paired high storage with a library ladder attached to a brass rail that runs around the room. The ladder has a designated parking area near the back door, where it can hang straight against the wall, according to Houzz. (Houzz)
That is a carefully planned custom solution, not a reason to put every shelf near the ceiling.
Test the proposed height with the people who will use the kitchen. Can they remove a plate without stretching or standing on a chair? Can they see the back of the shelf? Can they put an item away with both feet on the floor? A lower plan is often easier for people with mobility limitations, young children in the home, or anyone who does not want a ladder in a busy cooking area.
Depth needs the same test. Measure the items you plan to display, then check how far the shelf projects into the walkway or work zone. Do not choose a depth based only on what looks balanced in a photograph. A shelf that holds plates but makes a galley feel narrower may not be worth the trade.
For a ladder system, verify more than the rail’s appearance. The rail needs secure installation, the ladder needs an unobstructed travel path, and the parking position should keep it from swinging into a doorway or work area. The Atlanta example’s higher rail section, which lets the ladder rest flush against the wall, is part of the access plan.
5. Verify the wall and bracket system
Do not load a shelf until the wall construction and hardware are understood. Locate studs where possible, inspect the wall for obstacles, and read the instructions for the exact bracket and shelf material. A floating shelf is only as reliable as the wall, fasteners, brackets, shelf construction, and installation method working together.
A Family Handyman installation updated in October 2024 says the aluminum Hovr brackets used in its project claim to support up to 300 pounds when installed as directed. That is a product claim, not a universal capacity for floating shelves. Actual capacity depends on the bracket model, spacing, shelf material, fasteners, wall condition, and weight distribution. (Family Handyman)
Follow the manufacturer’s instructions for bracket spacing, fasteners, drilling, and setscrews. Do not copy a screw size from another shelf system or assume that a heavy-looking wood shelf can carry the same load as the example. The cited project fastens its wall bracket to studs with two No. 8 x 2½-inch washer-head screws at each stud and uses setscrews to secure the shelf, but those details apply to that system and installation. (Family Handyman)
If studs do not line up with the proposed location, stop and choose a compatible anchoring method or a different shelf system. Heavy dishes, cookware, and appliances deserve more caution than lightweight décor. When the wall contains unknown wiring or plumbing, or when the project involves a ladder rail, ask a qualified professional to assess it before drilling.
Test the finished shelf empty first. Check for movement, sagging, loose hardware, or a shelf that pulls away from the wall. Add the planned load gradually and distribute it rather than placing the heaviest item at one end.
6. Style open kitchen shelves around real maintenance
Styling should make daily life easier, not create a display that has to be rebuilt every morning. Start with pieces that already earn their place: colorful glassware, attractive bowls, favorite ceramics, or serving pieces used often enough to justify their visible position. Keep food packaging, overflowing collections, sharp tools, and items that gather dust quickly behind doors when possible.
Livingetc’s October 2024 coverage describes open shelving as a display choice that needs ongoing maintenance, with exposed dishes vulnerable to grease and dust. Style the shelves according to how often the household is willing to wipe them, not according to how much a photograph can hold. (Livingetc)
Group similar items instead of filling every inch. Leave enough space to remove one object without unloading the entire shelf. A small number of useful pieces is easier to clean than a crowded arrangement of decorative objects.
Near a range, choose washable items and expect more frequent cleaning. Keep oils and spices in a pull-out or cabinet if the shelf becomes greasy. The Atlanta kitchen paired its open oak shelves with slim spice and utensil pull-outs near the range, keeping high-use, less decorative items in more protected storage. (Houzz)
Color can help a shelf feel intentional without adding more objects. In that same Atlanta kitchen, white cabinetry near the window helped keep a bold green palette from feeling heavy, while oak shelves coordinated with the ladder and back door. Borrow the balance, not necessarily the exact finishes: one lighter element, one warm material, and a limited collection can do more than a wall packed with accessories.
If the open look is right but the upkeep is not, choose glass-front cabinets. Livingetc presents them as a middle ground, offering an airy feel while keeping contents less exposed. A single display shelf is another sensible compromise. It gives the kitchen a place for beautiful pieces without turning every storage decision into a styling exercise. (Livingetc)
7. Make the final install-or-skip decision
Complete the project only if the shelf passes these checks:
- The kitchen has enough closed storage for items that should not be displayed.
- The chosen wall does not interfere with doors, windows, lighting, cooking movement, or equipment.
- The shelf height works for the people who will use it.
- The depth holds the intended items without narrowing a walkway.
- The wall, brackets, fasteners, and shelf material are compatible.
- Grease and dust exposure are acceptable for the selected items.
- A ladder, if needed, has secure mounting, clear travel, stable footing, and a designated parking position.
If one answer is no, reduce the plan. Install one lower shelf, switch to a glass-front cabinet, improve concealed storage first, or skip open shelving altogether.
The Atlanta galley offers the clearest model: reclaim hidden depth, add pull-outs, plan access to high storage, and use open shelves for a specific visual purpose. The visible shelf should support the kitchen’s storage plan, not carry it.
Before buying brackets, make a two-minute display list. Write down what belongs in view and what needs a door, drawer, or pull-out. Install open shelving only for the first list, and let the rest of the kitchen do the less glamorous storage work.
