
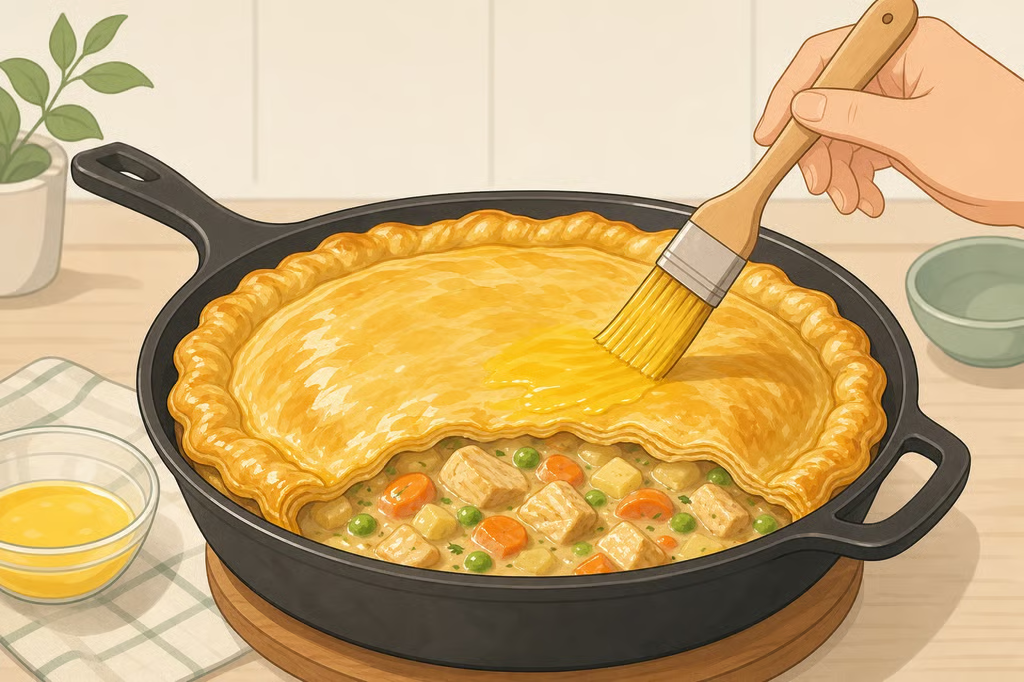
How to Make the Best Chicken Pot Pie With Crisp Puff Pastry
The best chicken pot pie recipe for a busy night starts with a thick, savory filling and ends with one cool sheet of store-bought puff pastry. This single-crust method keeps the pastry crisp on top, avoids the usual soggy bottom, and gives the filling enough structure to spoon neatly. The version below uses boneless, skinless chicken thighs, carrots, celery, leeks, peas, thyme, cream, and chicken stock.
A good pie should have tender chicken and vegetables in a well-seasoned gravy, with pastry that is buttery, crisp, and fully cooked. The gravy should cling to the filling without turning gluey or watery, the standards used in Great British Chefs’ chicken pie method. The recipe is designed for a single top crust, not a from-scratch double-crust pie, so it is a practical choice when dinner needs to stay manageable.
What to prepare
Equipment
- A 10-inch oven-safe skillet
- A rimmed baking sheet
- A rolling pin
- A pastry brush
- A sharp knife for venting the pastry
Use an oven-safe skillet that can tolerate a 200°C fan oven. If the skillet is not suitable, cook the filling on the stovetop and transfer it to an oven-safe baking dish before adding the pastry.
Ingredients for the filling
- 500 grams boneless, skinless chicken thighs, cut into bite-size pieces
- 2 tablespoons unsalted butter, oil, or a mixture of both
- 2 carrots, peeled and diced
- 2 celery sticks, finely chopped
- 2 medium leeks, sliced into half-moons
- 2 tablespoons plain flour
- 600 milliliters chicken stock
- 4 tablespoons single cream
- 150 grams frozen peas
- 1 bay leaf
- 1 teaspoon dried thyme, or 1 tablespoon fresh thyme, finely chopped
- Salt and pepper
Ingredients for the topping
- 1 sheet store-bought puff pastry, thawed enough to unfold but still cool
- 1 egg, beaten, for egg wash
Keep the pastry refrigerated while the filling cooks. It should bend without cracking, but it should not feel warm or limp. Puff pastry works especially well here because it delivers a flaky, crisp crust without the handling and chilling required for homemade double-crust dough.
Why a single top crust works
A single-crust pie puts the pastry where it has the best chance of staying crisp: on top of a bubbling filling, with no bottom layer sitting directly against the skillet. The format also lets the filling go under the pastry while hot when the pie is going straight into the oven. That removes a timing step that can make weeknight cooking drag.
The pastry still needs some heft. Rolling it too thin can leave the center sagging, while a cool, slightly thicker sheet gives the top enough structure to puff and brown. Leave plenty of overhang around the skillet rim, then secure the pastry so it does not pull away as it bakes.
A double-crust pie is a separate project. America’s Test Kitchen’s double-crust version uses chilled dough and calls for at least 45 minutes of cooling before serving so the filling can set. That approach has its place, but it is not the quickest route to a crisp top.
How to make homemade chicken pot pie
1. Heat the oven and set up the skillet
Adjust the oven rack to the middle position and heat the oven to 200°C fan. Set the skillet on the stovetop and place the rimmed baking sheet nearby.
The baking sheet will sit beneath the skillet during baking. It gives the pan a stable surface and catches any filling that bubbles over the edge, which is normal for this style of pie.
2. Cook the chicken
Heat the butter, oil, or mixture in the skillet over medium heat. Add the chicken and cook, stirring occasionally, until the pieces are cooked through. The largest piece should be opaque in the center, with no raw-looking section. Transfer the chicken to a bowl.
Boneless, skinless thighs are a forgiving choice because they do not dry out as easily as breast meat, according to Great British Chefs. Leftover cooked roast chicken can also be used. In that case, skip this step and stir the chicken in with the peas later.
3. Soften the vegetables
Add the carrots, celery, leeks, bay leaf, thyme, salt, and pepper to the same skillet. Cook over medium heat, stirring often, until the vegetables begin to soften and look glossy.
The carrots should lose their raw crunch, while the leeks and celery should look tender but not collapsed. This is the flavor base of the pie, so give the vegetables time to soften before adding the flour.
4. Coat the vegetables with flour
Sprinkle the flour over the vegetables and stir until it is evenly absorbed. Keep stirring until the mixture looks sticky rather than dusty and no dry flour remains on the skillet.
Coating the vegetables first helps the flour thicken the stock and cream evenly. Do not pour in the liquid while pockets of dry flour are still visible, or the gravy may turn lumpy.
5. Thicken the filling
Slowly pour in the chicken stock, stirring as you go. Add the cream and bring the mixture to a simmer. Cook, stirring often, until the gravy thickens and clings to the vegetables.
The right consistency is spoonable, not stiff. Draw a spoon through the skillet. The gravy should briefly hold the trail before flowing back together. If it still runs like broth, continue simmering until it thickens. If it becomes too dense, loosen it with a small splash of stock.
Remove the bay leaf and taste the gravy for salt and pepper before adding the chicken and peas.
6. Add the peas and chicken
Stir the cooked chicken and frozen peas into the thickened gravy. Cook until the filling is hot and the peas are distributed throughout.
At this point, the mixture should look rich and cohesive. The chicken and vegetables should stay suspended in the sauce rather than sinking into a thin pool. If the filling is watery, simmer it briefly before bringing out the pastry. Once the pastry is on, there is no easy way to correct a loose filling without overbaking the crust.
7. Roll the puff pastry
Unfold the thawed pastry on a lightly floured surface. Roll it only enough to cover the skillet with some overhang. Keep the sheet relatively thick rather than stretching it paper-thin.
If the pastry cracks, let it soften for a moment before rolling. If it becomes warm, floppy, or difficult to lift, return it to the refrigerator while the filling finishes. Cold pastry is easier to handle and gives the top a better chance of puffing.
8. Cover the hot filling
Place the pastry over the hot filling. Press or fold the overhang against the skillet rim so it stays attached. Brush the surface with the beaten egg, taking care not to leave thick puddles in the folds.
Cut several small vents in the center of the pastry. The vents let steam escape and help keep the top from becoming damp underneath. Some filling may bubble up around the edge while the pie bakes. That is not a failure, and the baking sheet will catch the overflow.
Bake the pie immediately when using hot filling. For a make-ahead or freezer pie, cool the filling completely before adding the pastry. Steam from a hot filling can make unbaked pastry soggy before it reaches the oven.
9. Bake until golden and bubbling
Set the skillet on the rimmed baking sheet and bake at 200°C fan for 30 to 40 minutes, or until the pastry is crisp and golden brown, as directed by Great British Chefs.
Look at the center of the pastry, not just the edges. It should be colored and firm rather than pale or wet. The filling should bubble beneath the crust. If the pastry browns before the filling is hot, cover the top loosely with foil and continue baking. Keep the foil tented so it does not press against the pastry.
10. Rest before serving
Remove the skillet from the oven and let the pie stand for 5 to 10 minutes before serving. This gives the filling a chance to settle so it is less likely to flood across the plate.
The short rest is all this single-crust version needs. A double-crust pie requires a much longer cooling period because the enclosed filling continues to set as it cools.
Make-ahead, freezing, and reheating
The filling and pastry can be prepared a few days ahead, according to Great British Chefs. Keep the filling covered in the refrigerator, and keep the pastry well wrapped so it does not dry out. Add the pastry on the day of serving, then bake the pie straight away.
For freezing, cool the filling completely before assembling. Add the pastry and egg wash, then freeze the unbaked pie immediately. Bake it from frozen at the same oven temperature, adding 10 to 15 minutes to the cooking time.
Refrigerated leftovers will lose some of the pastry’s crispness. Reheat the pie in the oven at 180°C for about 20 minutes, covering the pastry loosely with foil if it starts to brown too quickly. An oven is a better choice than a microwave when keeping the crust crisp matters.
Chicken pot pie cooking tips that matter most
- Choose chicken thighs when tenderness and a forgiving cooking process matter most.
- Cook the vegetables until they are beginning to soften before adding flour.
- Stir the flour until it fully coats the vegetables and looks sticky.
- Simmer until the gravy clings to a spoon, but do not reduce it into a paste.
- Keep puff pastry cool and avoid rolling it too thin.
- Put pastry on hot filling only when the pie is going straight into the oven.
- Cut vents in the pastry so steam can escape.
- Bake until the center is golden, not merely the edges.
- Rest the pie for 5 to 10 minutes before serving.
For a dependable weeknight result, make the filling ahead if that suits the household schedule, then wait to add the puff pastry until the skillet is ready for the oven. That small timing choice protects the crust and gives the pie the crisp top and thick, comforting filling worth sitting down for.
