
Homemade Cosmic Brownies Recipe: Fudgy Base & Set Ganache
This homemade Cosmic Brownies recipe recreates the fudgy base, smooth chocolate ganache, and colorful candy-coated topping of the nostalgic snack cake. The most important success cues are simple: use a metal 9-by-13-inch pan, avoid overbaking, and wait until the brownie base is completely cool before adding the ganache.
The recipe makes 12 large rectangles, or 24 smaller servings. Plan for about 15 minutes of preparation, 22 to 26 minutes of baking, about one hour for cooling, and at least one hour for the ganache to set. That works out to roughly 2 hours and 37 minutes, plus a few minutes to make and spread the ganache, with most of the time hands-off. The timing and quantities come from the tested formula at Balancing Motherhood.
The fudgy texture comes from the formula and the order of mixing, not from the topping alone. Melted butter, two sugars, corn syrup, minimal mixing after the flour is added, and a moist-crumb bake point all matter. As a recent Popular Science explanation of brownie chemistry notes, ingredient ratios help determine whether brownies turn out fudgy, cakey, or chewy.
Recipe at a glance
- Yield: 12 large rectangles or 24 smaller servings
- Prep time: 15 minutes
- Bake time: 22 to 26 minutes
- Cooling time: About 1 hour
- Chill time: At least 1 hour
- Pan: 9-by-13-inch metal baking pan
- Oven: 350°F
- Allergens: Contains wheat, eggs, and dairy
Gather parchment paper with enough overhang to lift out the cooled slab. A candy or instant-read thermometer is not needed. The eggs, milk, heavy cream, and butter can be prepared as listed. No special room-temperature instruction is required, but the melted butter should not be hot when it goes into the batter.
Ingredients
For the brownie base
- 1 cup melted unsalted butter, or 2 sticks
- 1 ¼ cups granulated sugar
- ¾ cup packed light brown sugar
- 3 large eggs
- 3 tablespoons milk
- 1 ½ tablespoons corn syrup
- 1 tablespoon vanilla extract
- 1 cup unsweetened cocoa powder
- 1 ½ cups all-purpose flour
- ¾ teaspoon salt
For the ganache
- 1 ½ cups semi-sweet chocolate chips
- ¾ cup heavy cream
- 1 tablespoon unsalted butter
For the topping
- Rainbow candy-coated chocolate chips
- Mini M&M’s or sprinkles, if needed as alternatives
The ingredient list, including the corn syrup and two types of sugar, is adapted from the tested brownie recipe. Those ingredients are part of that recipe’s chewy, non-cakey design, rather than a guarantee that any single ingredient creates the texture by itself.
For the cocoa, use regular natural cocoa powder if following the tested version. Dutch-process cocoa also works and gives a darker color and smoother flavor, according to the recipe source. The two kinds differ in acidity and flavor, so switching cocoa can slightly change the finished brownie.
How to make homemade Cosmic Brownies from scratch
1. Prepare the pan and oven
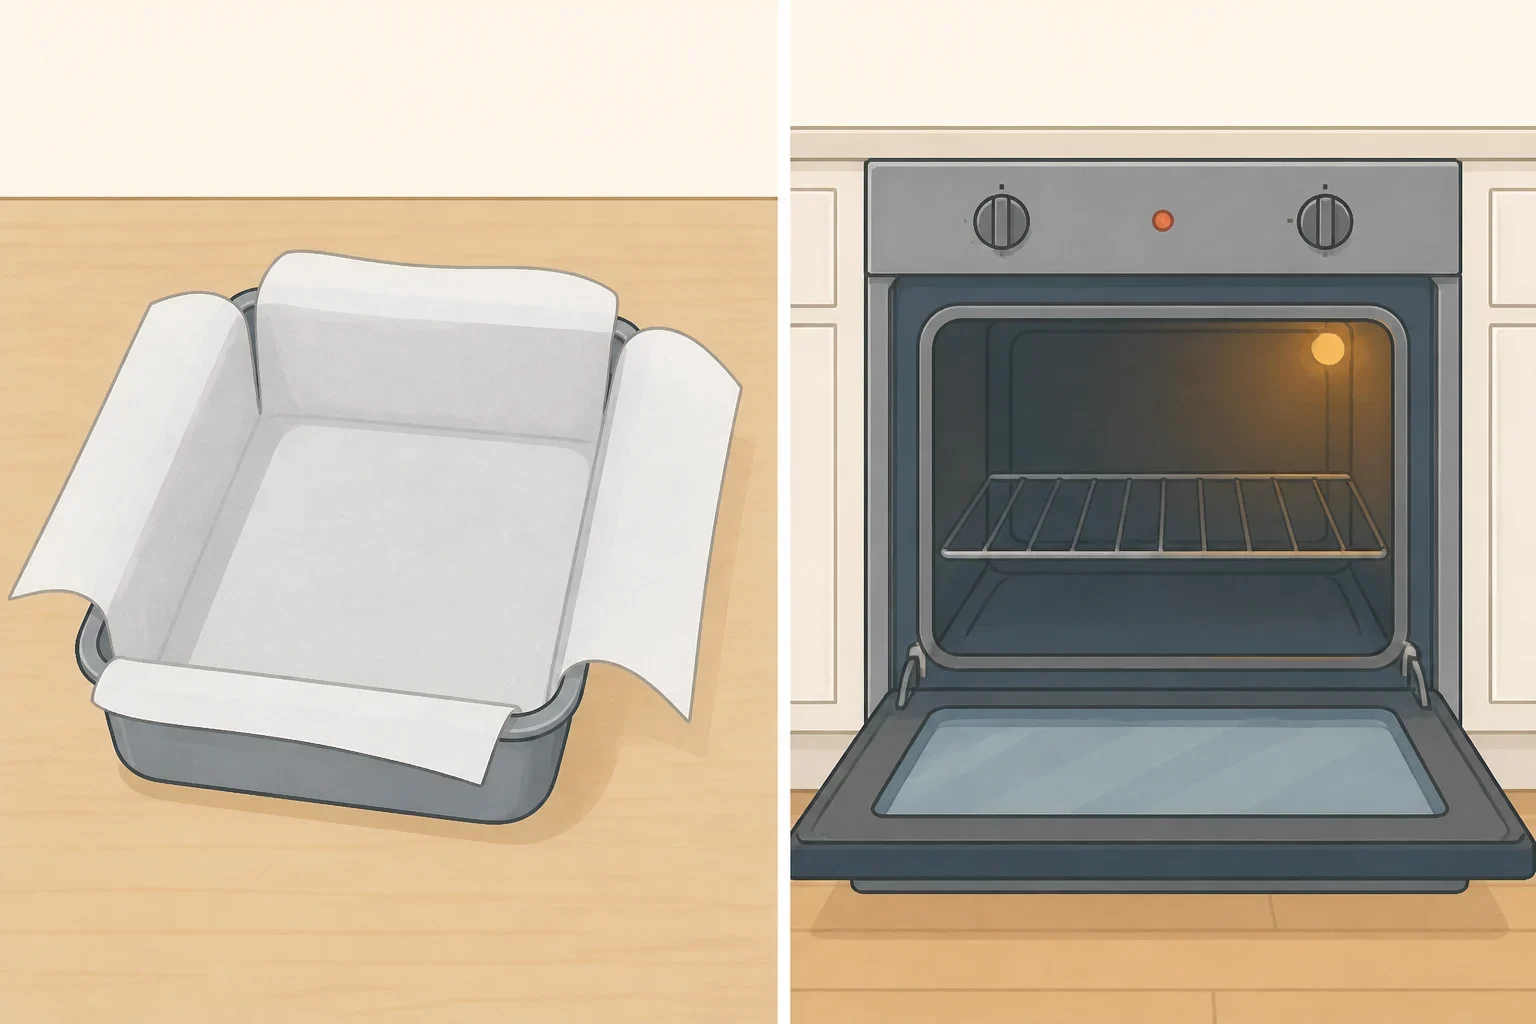
Heat the oven to 350°F. Line a 9-by-13-inch metal pan with parchment paper, leaving enough paper hanging over the long sides to lift out the finished slab.
A metal pan is the better choice for this recipe because it heats quickly and encourages firmer edges. Glass and ceramic pans heat more slowly and can bake the edges and center less evenly, as Popular Science explains.
If parchment is unavailable, lightly grease the pan and dust it with cocoa powder instead of flour. That keeps a white flour residue from showing on the brownies, a suggestion included by Balancing Motherhood.
2. Whisk the wet ingredients vigorously
Add the melted butter, granulated sugar, brown sugar, eggs, milk, corn syrup, and vanilla to a large bowl. Whisk vigorously for at least one minute, until the mixture looks smooth and well combined.
Do this before adding any flour. The recipe source specifically calls for vigorous whisking at this stage, and the sugar helps create the shiny, crackly surface as it dissolves and later reforms during baking. Mixing now also prevents the need for aggressive stirring after the flour enters the bowl.
3. Add the cocoa
Whisk in the cocoa powder until no dry streaks remain. Scrape the sides and bottom of the bowl so the cocoa is evenly distributed.
This base uses cocoa powder rather than melted chocolate. Cocoa powder brings chocolate flavor without the cocoa butter found in melted chocolate, so the melted butter and ganache provide much of the richness and moisture in this particular formula. Popular Science notes that more fat generally supports a richer, fudgier brownie.
4. Fold in the flour and salt gently
Add the all-purpose flour and salt. Stir with a spatula or wooden spoon just until the flour disappears.
Stop as soon as the batter comes together. Flour proteins form gluten when mixed with liquid, and more mixing strengthens that network, nudging brownies toward a lighter, more cake-like texture. Minimal mixing helps keep this copycat Little Debbie Cosmic Brownies recipe dense and chewy. The batter should be thick and spreadable.
There is no baking soda or baking powder in this formula. Leavening adds lift and air, which can move the texture toward cake rather than the low-rise brownie needed here, according to Popular Science.
5. Spread and bake the brownie base
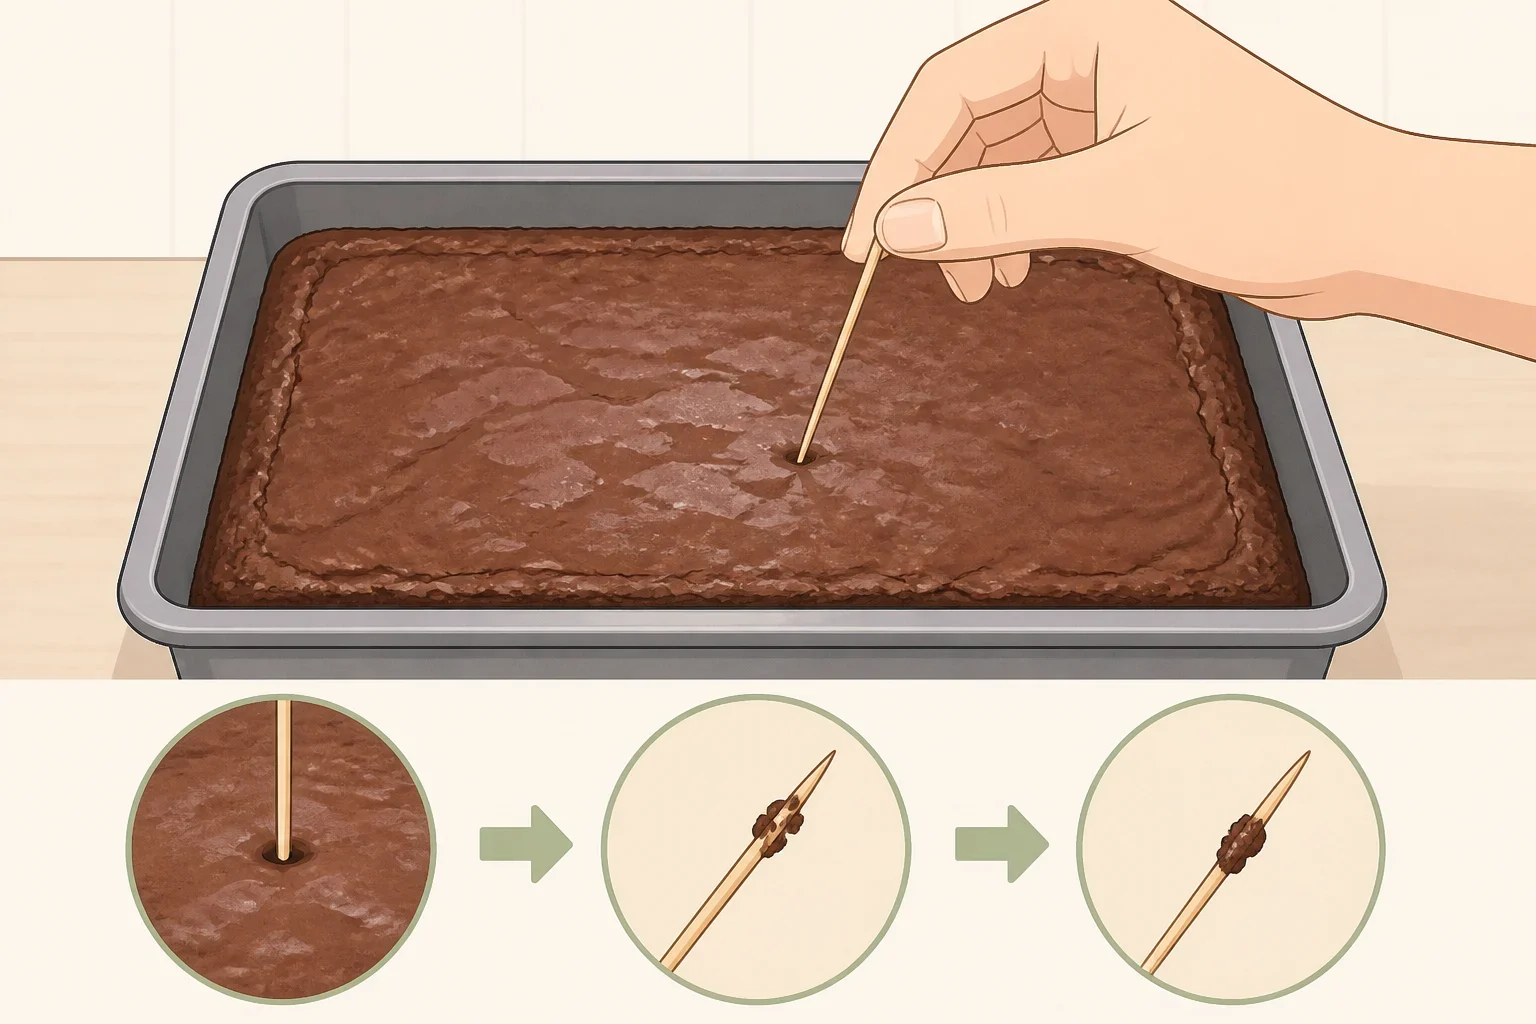
Scrape the batter into the prepared pan and spread it evenly into the corners. Bake for 22 to 26 minutes.
Begin checking at the shorter end of the baking range. The edges should look set, while the center may still look slightly glossy. Insert a toothpick into the center. It should come out with a few moist crumbs, not completely clean, as recommended by Balancing Motherhood.
A clean toothpick usually means the brownies have gone too far for the intended fudgy texture. Brownies continue cooking from the heat they retain after leaving the oven, a process called carry-over cooking, so removing them when a few moist crumbs remain gives the center time to finish setting without drying out. The Popular Science explanation distinguishes this moist-crumb test from the clean-toothpick test used for cakier brownies.
6. Cool the slab completely
Leave the brownies in the pan until fully cool, about one hour. The surface should no longer feel warm, and the center should be firm enough that it does not wobble when the pan is gently moved.
Do not pour ganache over a warm base. Letting the brownie cool fully gives the ganache a smooth surface to spread across and allows it to set properly. It also prevents trapped heat from creating condensation, which can make baked goods soggy during storage, according to Mrs. Fields.
How to set the ganache
7. Warm the cream and make the topping
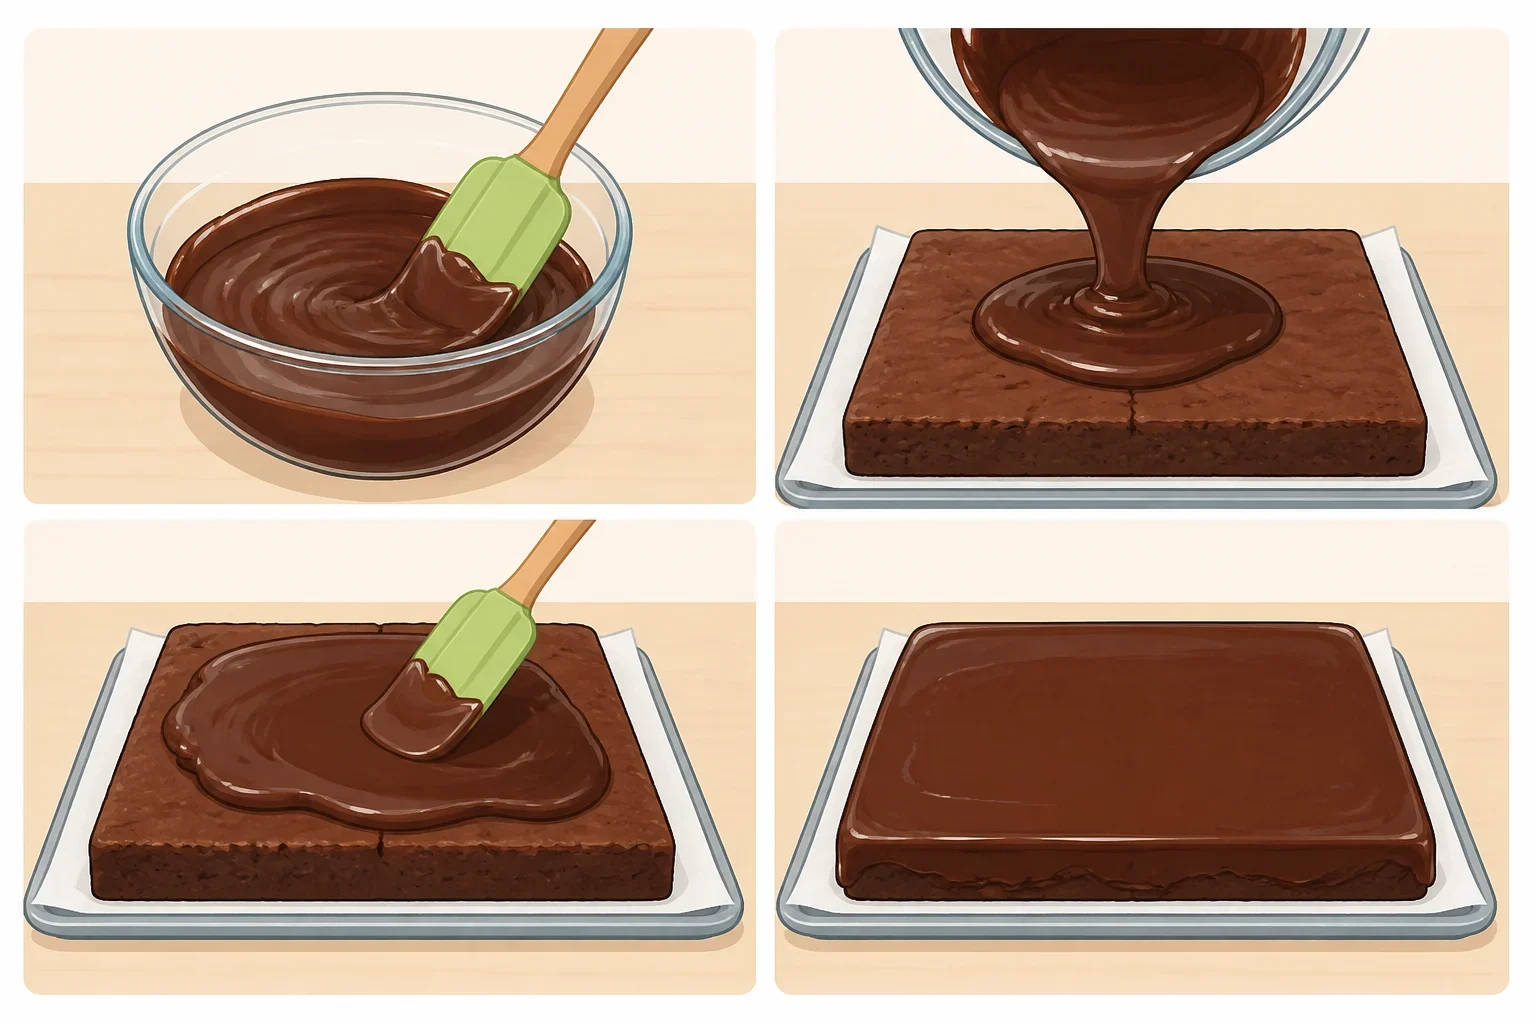
Place the chocolate chips in a heatproof bowl. Warm the heavy cream until steaming, but do not let it boil. Pour the cream over the chocolate and leave it undisturbed for 2 to 3 minutes.
Add the tablespoon of butter, then stir slowly until the mixture becomes smooth and glossy. If the ganache looks grainy, warm it gently and whisk. A teaspoon of warm cream can help smooth it, a fix provided by Balancing Motherhood.
Pour the ganache over the completely cooled brownie slab. Spread it to the edges with a spatula while it is still glossy and easy to move.
8. Add the candy-coated topping
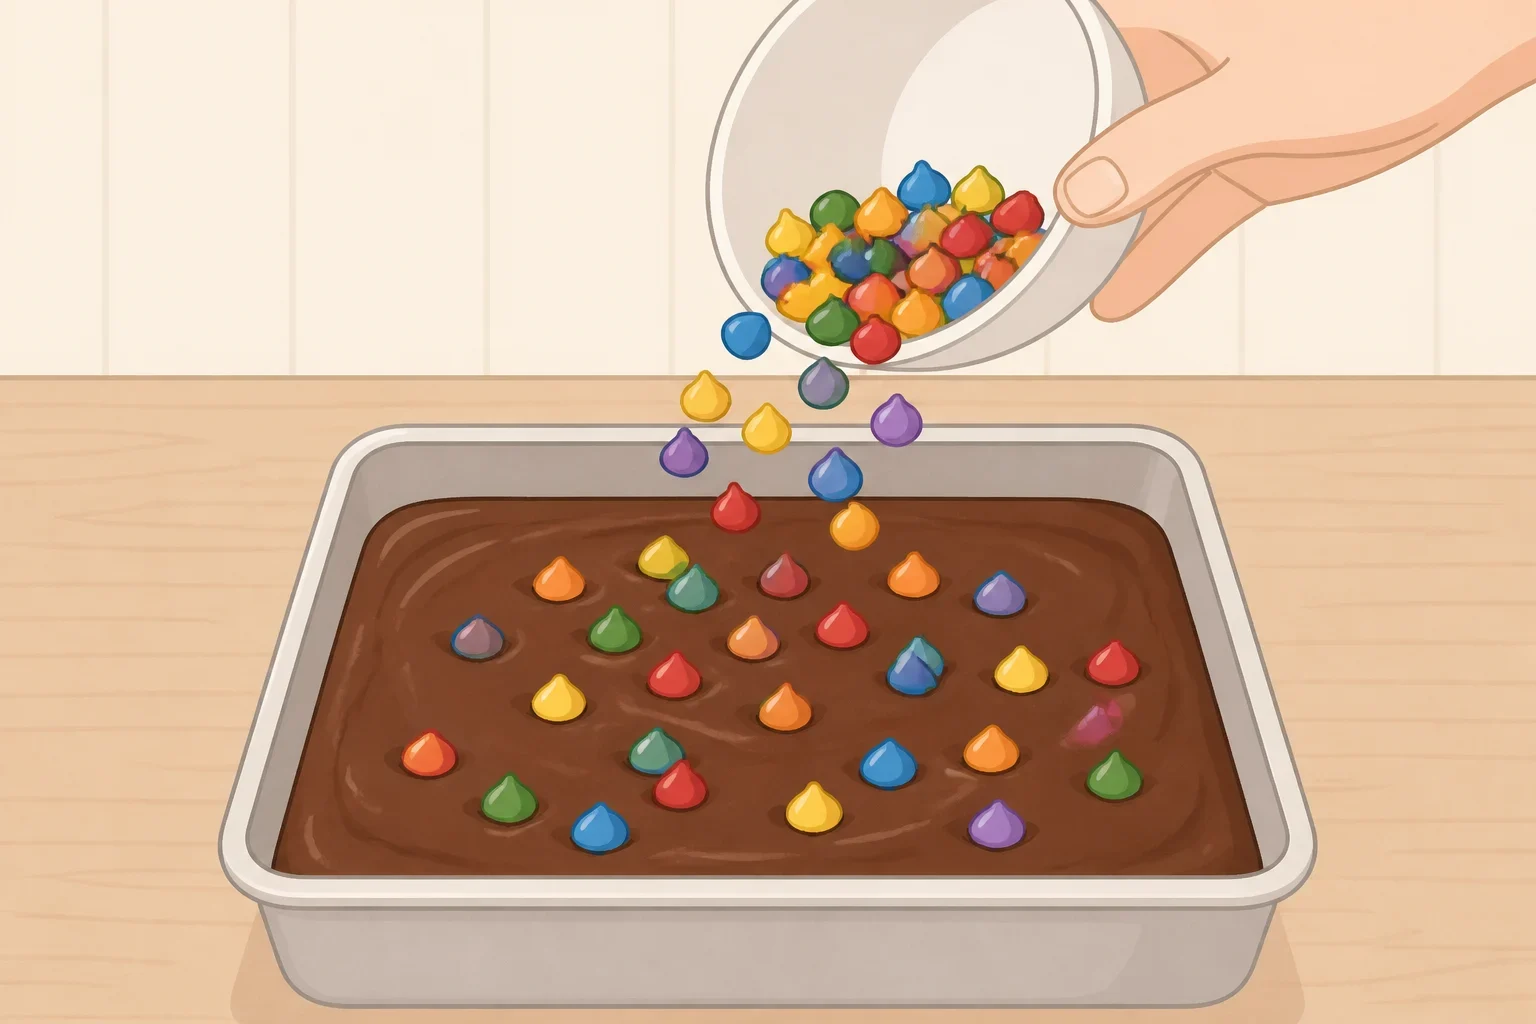
Scatter the rainbow candy-coated chocolate chips over the ganache while it is still soft. They should settle slightly into the surface instead of rolling away. The colorful topping is what gives these brownies the recognizable Cosmic Brownies look, and Crazy for Crust uses the same finishing step.
Mini M&M’s or sprinkles can stand in if candy-coated chocolate chips are not available. Keep the topping close to the surface rather than pressing it deeply into the ganache.
9. Chill, slice, and serve
Refrigerate the pan for at least one hour, until the ganache feels firm. Lift the brownie slab out using the parchment overhang.
For 12 large rectangles, cut three rows by four rows. A ruler helps keep the pieces even, especially if the brownies are being served at a gathering. For smaller servings, cut each rectangle in half. The three-by-four method comes from Balancing Motherhood.
For the best texture, let refrigerated brownies sit out for about 15 minutes before serving. The ganache will soften slightly while the base remains dense and chewy. This short rest is a texture preference for this recipe, not a universal requirement for every brownie.
How to store the brownies
Store the brownies in an airtight container. If possible, keep the slab whole and cut pieces as needed, since exposed cut edges dry out faster. If stacking pieces, place parchment between the layers.
The recipe source gives two storage options: room temperature for up to three days or refrigerated for up to one week. Room-temperature storage produces a softer ganache, while refrigeration makes the topping firmer. General brownie storage guidance from Mrs. Fields also notes that refrigeration can change texture and is most useful for longer storage, warm conditions, or brownies with perishable ingredients.
Because this ganache contains heavy cream and the brownies contain eggs and dairy, refrigeration is the practical choice for longer storage and warm weather. If transporting the brownies on a warm day, keep them in a single layer with a cold pack. The ganache can soften as it gets warm.
For longer storage, wrap individual slices in plastic wrap and place them in a freezer bag. Freeze for up to two months, then thaw the wrapped brownies overnight in the refrigerator. Let them come toward room temperature before serving so the ganache is not stiff.
This dessert is best treated as a make-ahead bake. Prepare the brownie base early enough for it to cool completely, add the ganache and candy-coated chips, then chill until firm. A short rest before serving brings the topping back to a softer, more snack-cake-like texture.
